
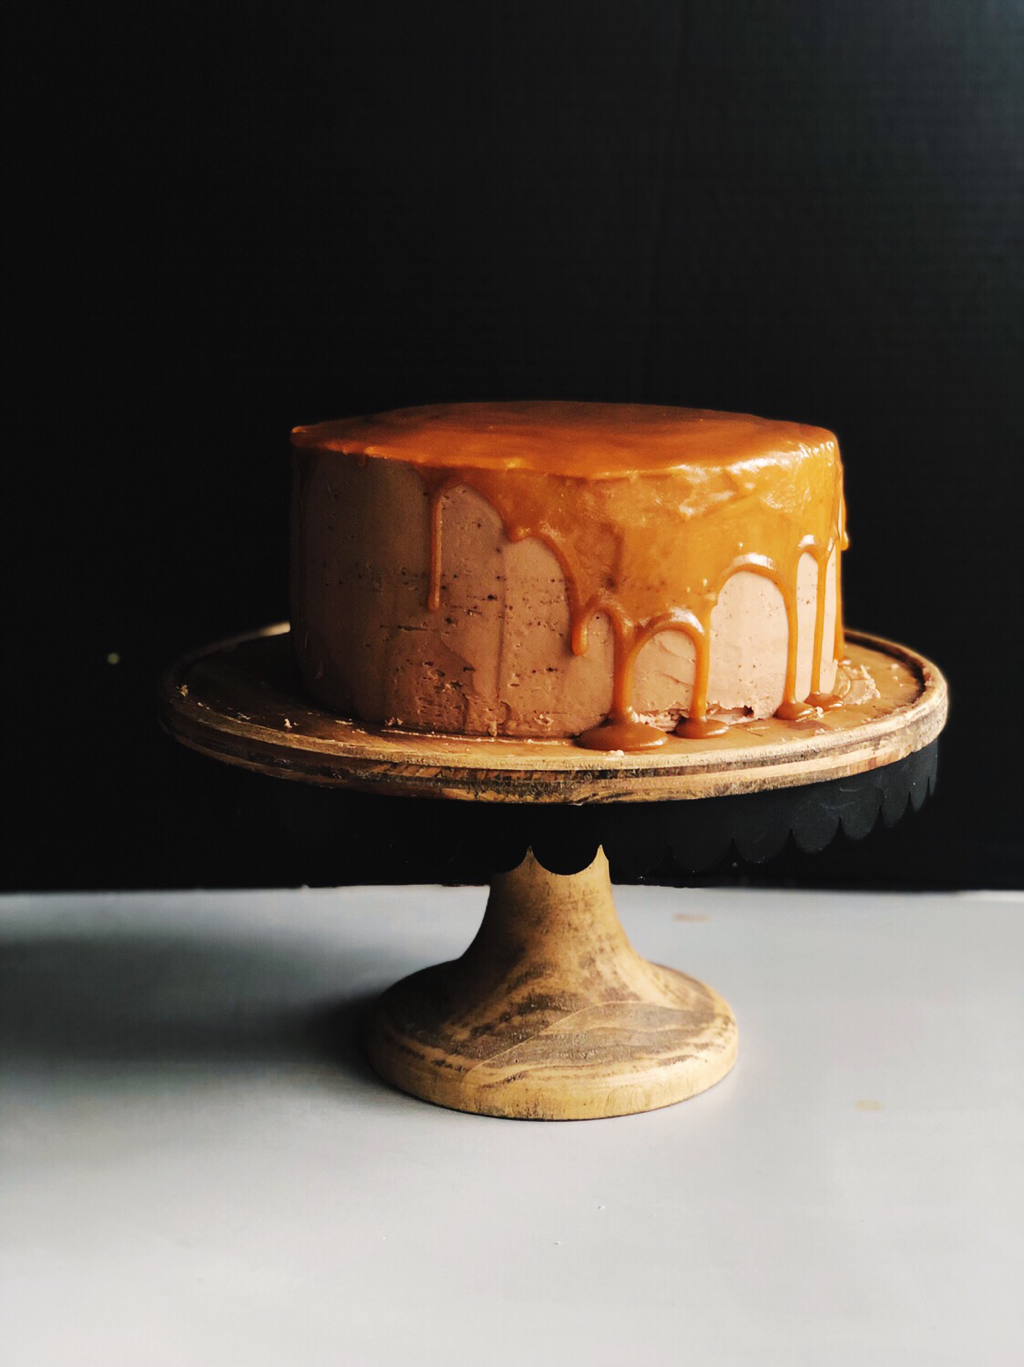
 This moist and decadent Chocolate cake is filled with Espresso (powder) and hot coffee, layered with fluffy and creamy Milk Chocolate Frosting and a sticky-sweet caramel that is infused with coffee. That same Coffee-Caramel is then poured over the top of the cake making it look (and taste) incredibly irresistible. This cake was so much fun to make. It was even more fun to bring to our church potluck. It's nice to be able to share something you love with people you love. And it's even nicer when they end up loving that thing too. So now that you're craving this Espresso Chocolate Cake: Let's make it together... Begin with 2 cups of sugar in a large bowl 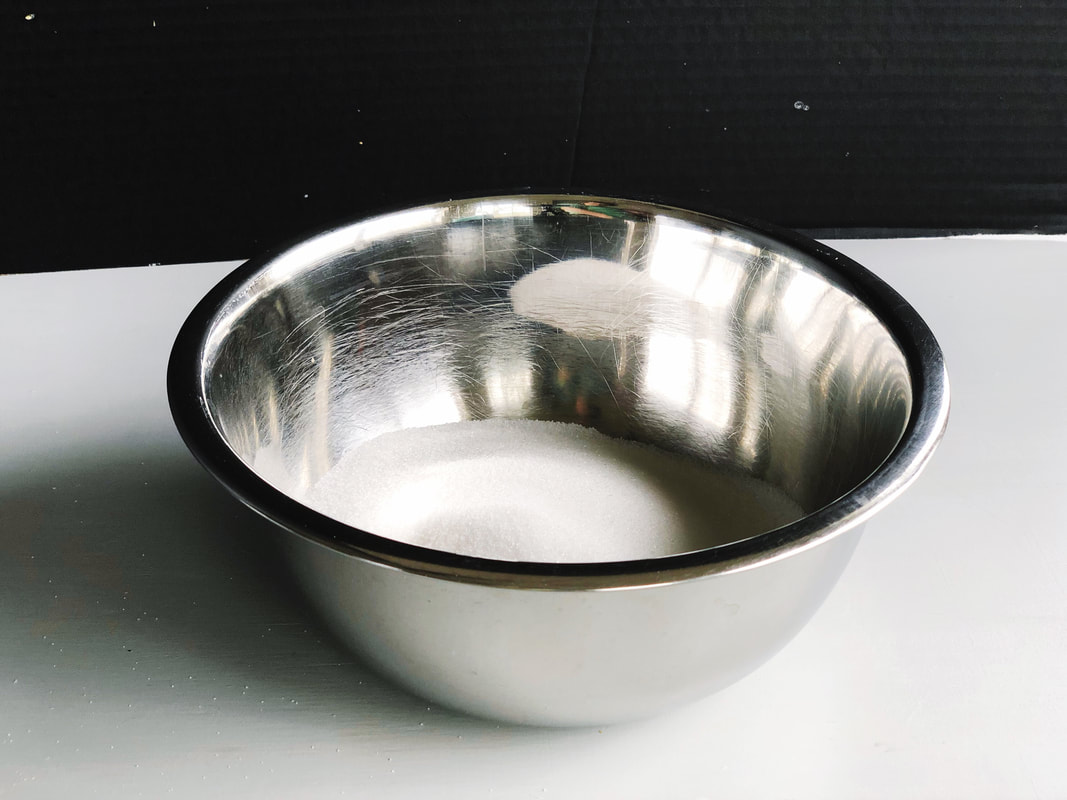 Next. 1 3/4 cups flour 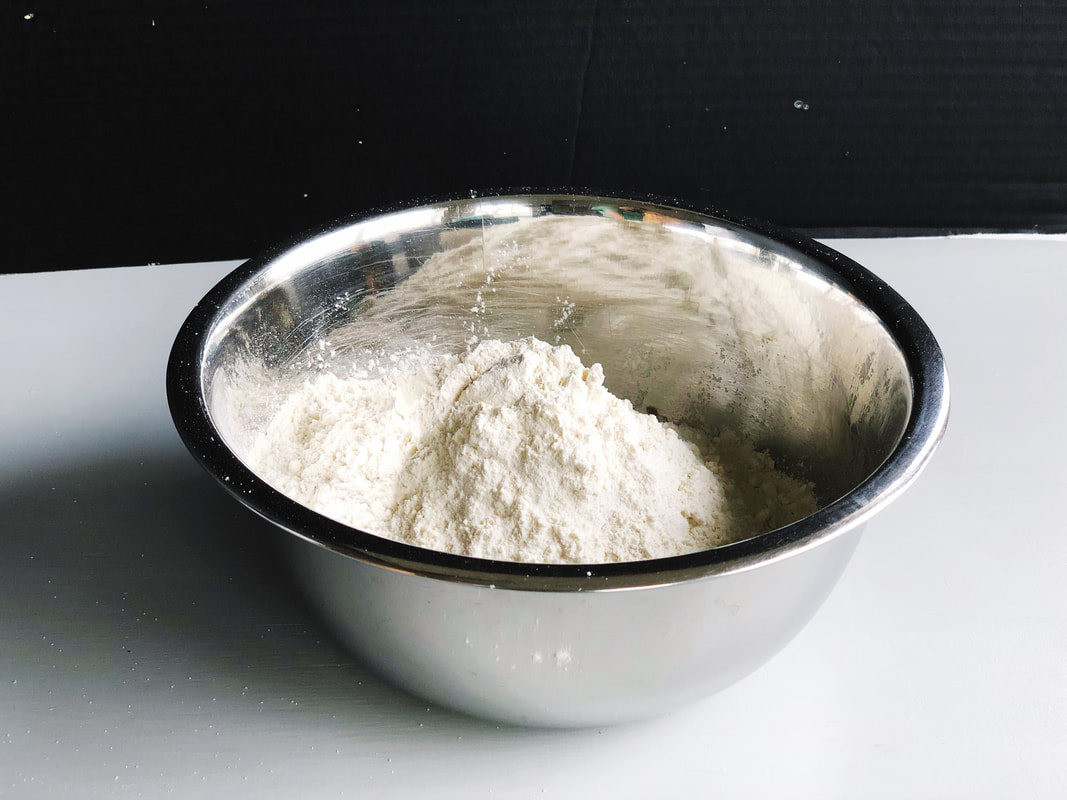 Followed by 3/4 cups Dutch Processed Cocoa Powder 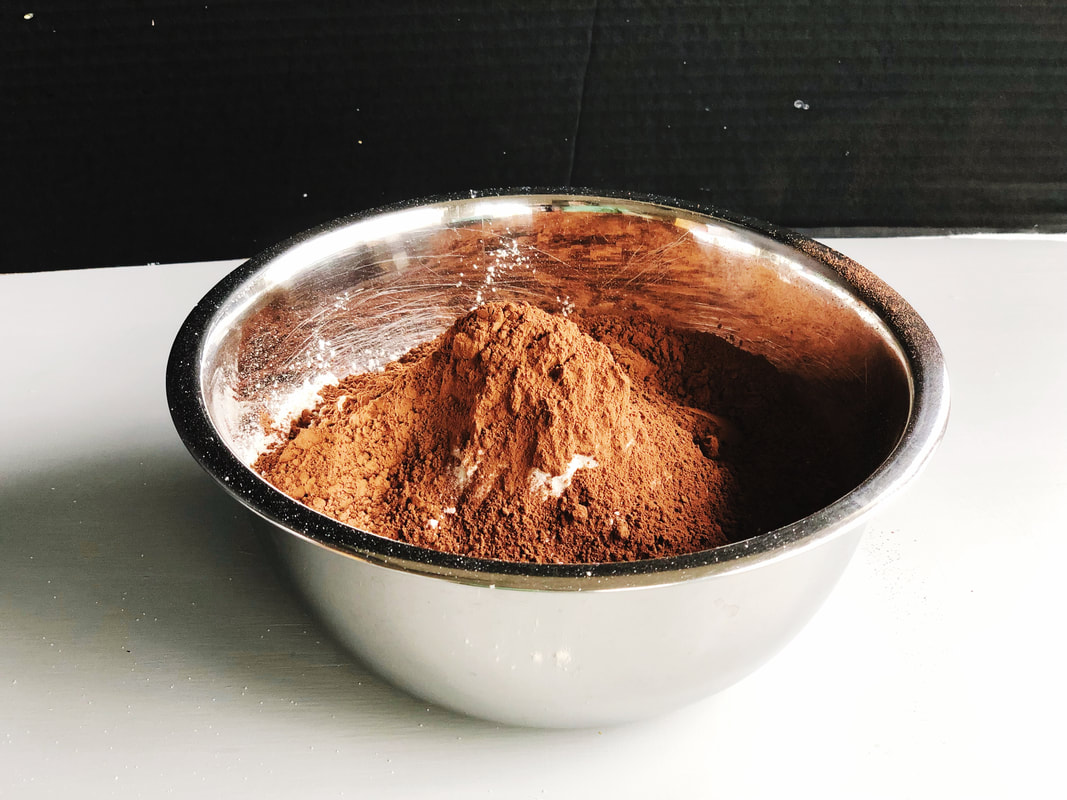 Then 1 1/2 t Baking Powder 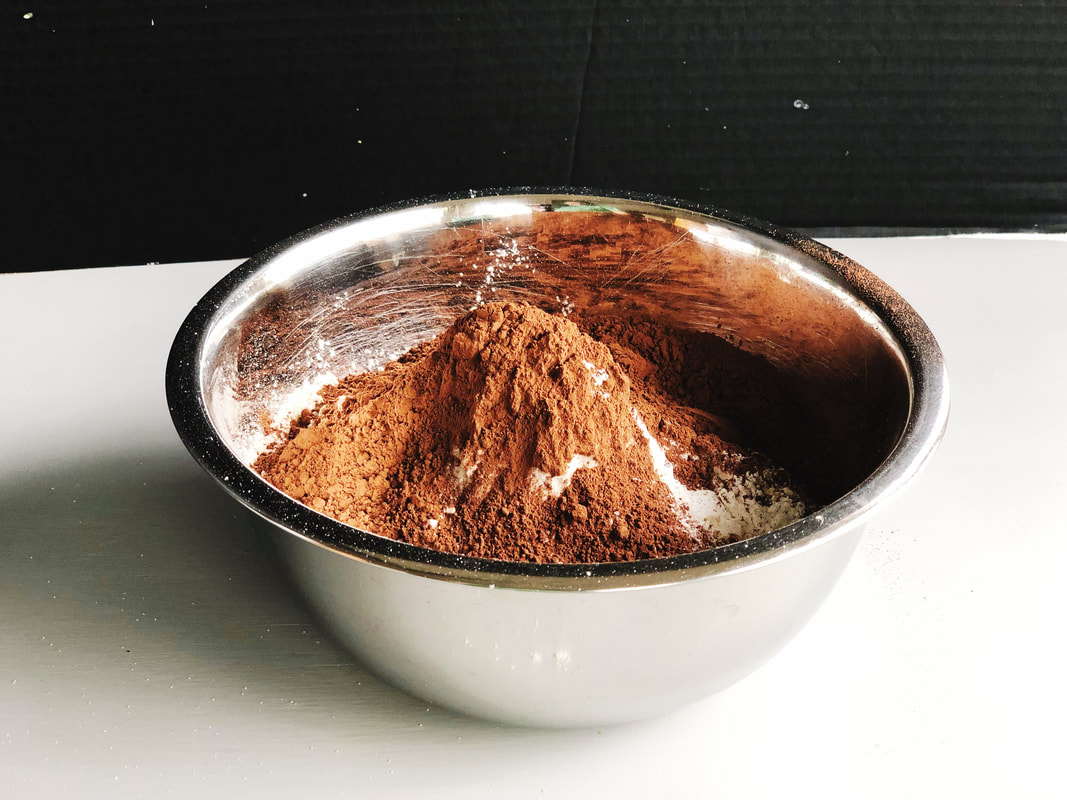 and 1 1/2 t Baking Soda 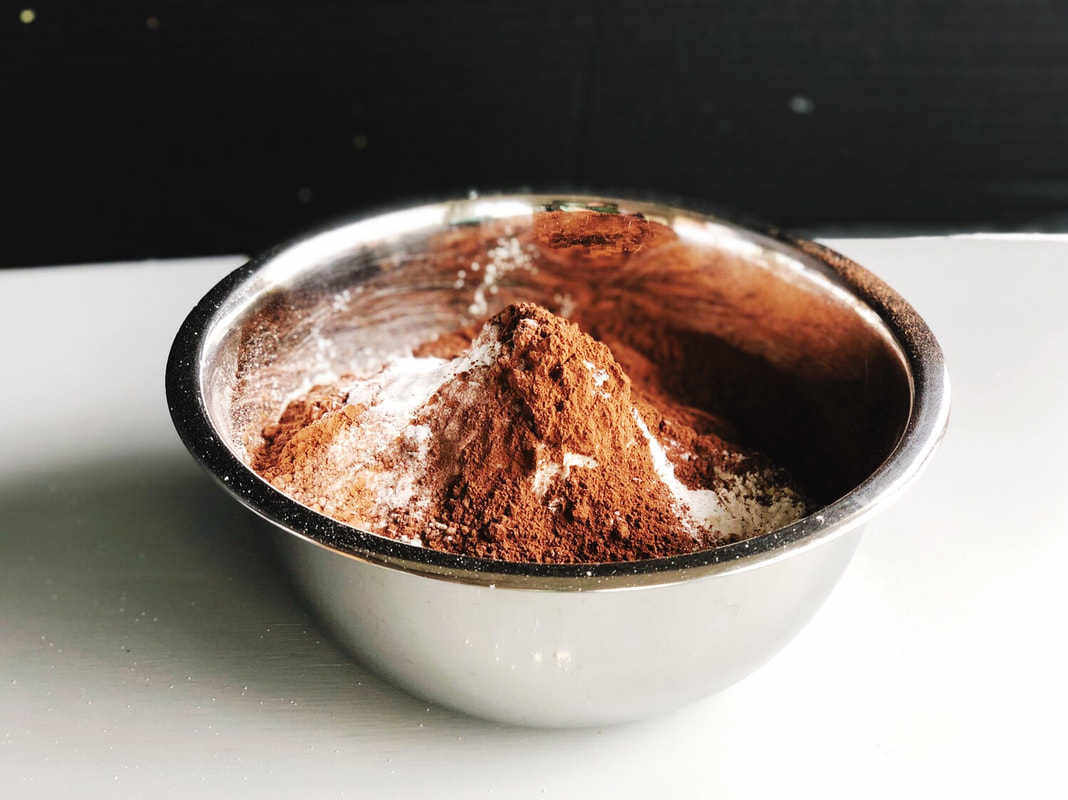 Lastly, 1 T Espresso Powder 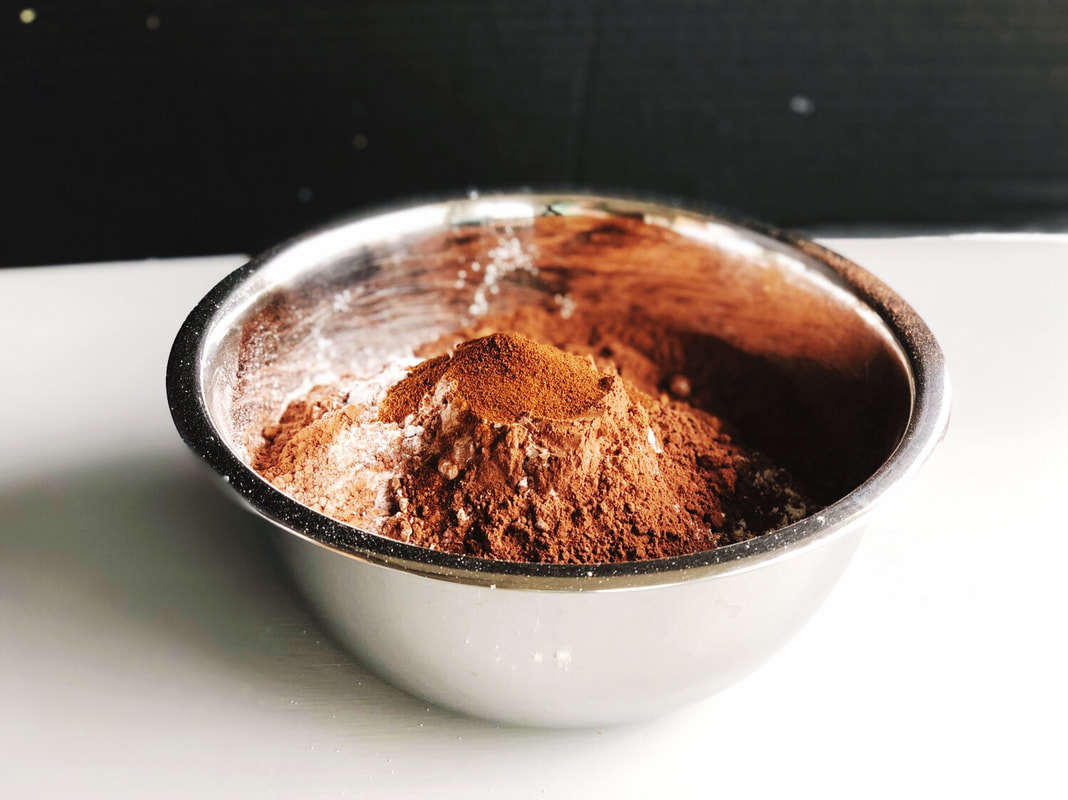 Whisk it all together 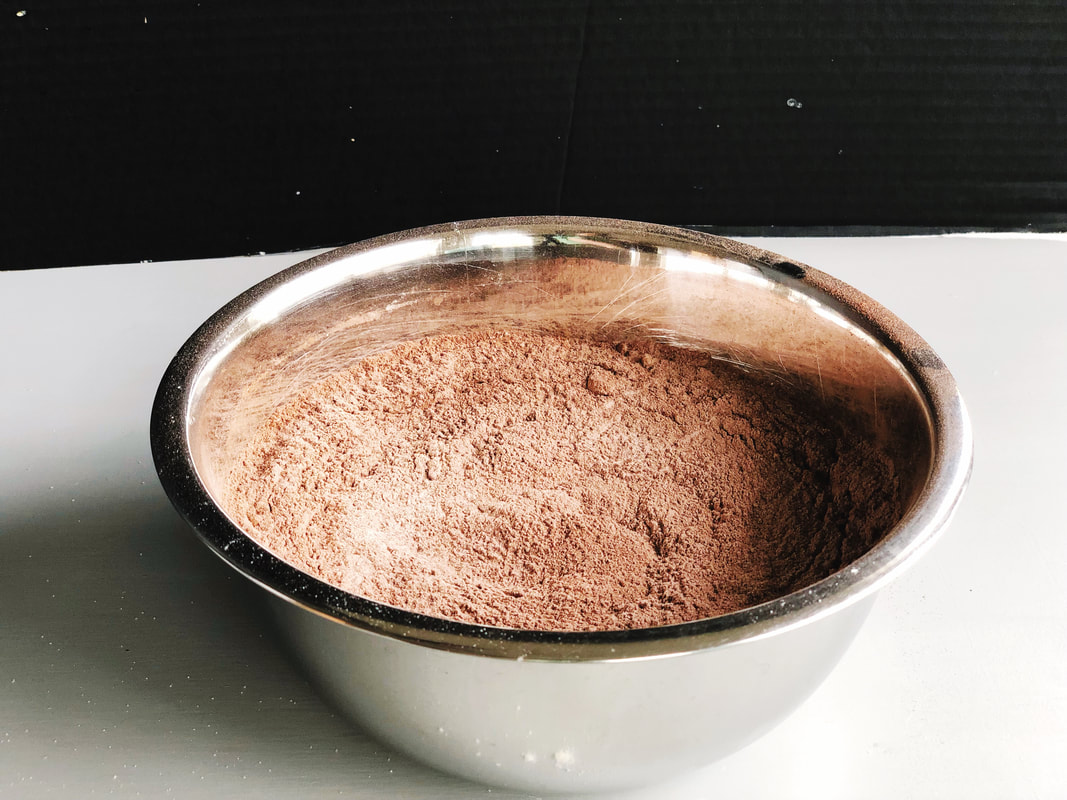 Add 1 tsp salt and whisk again 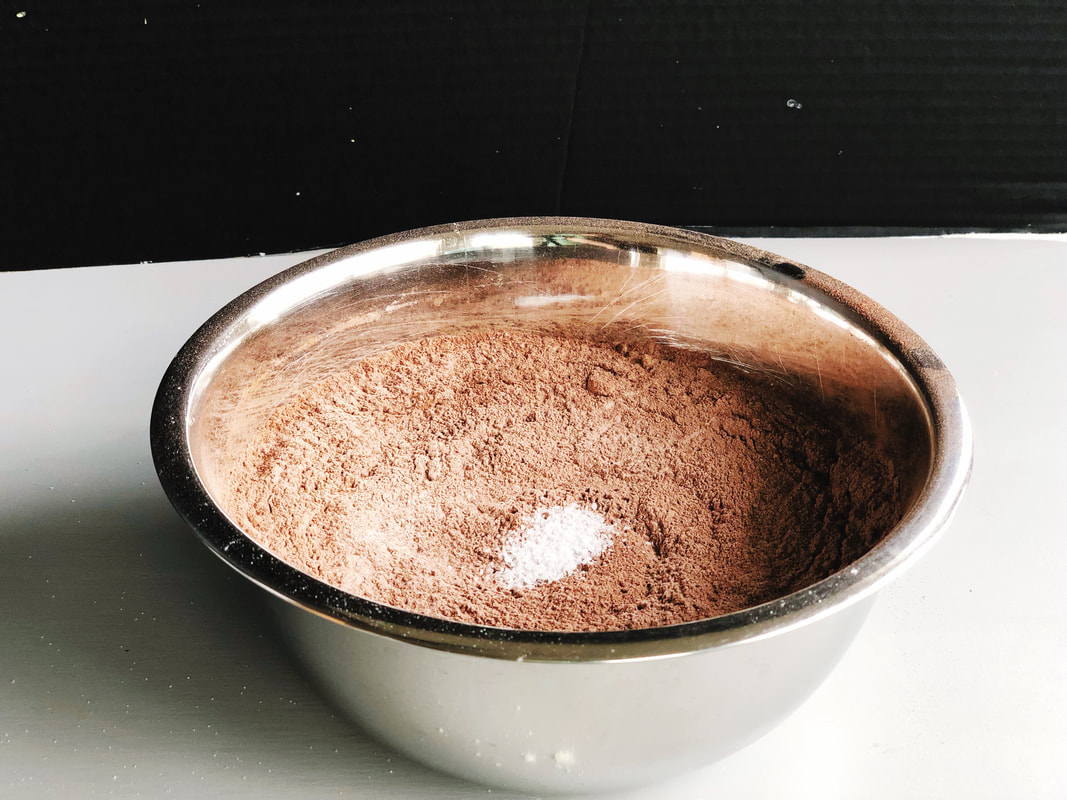 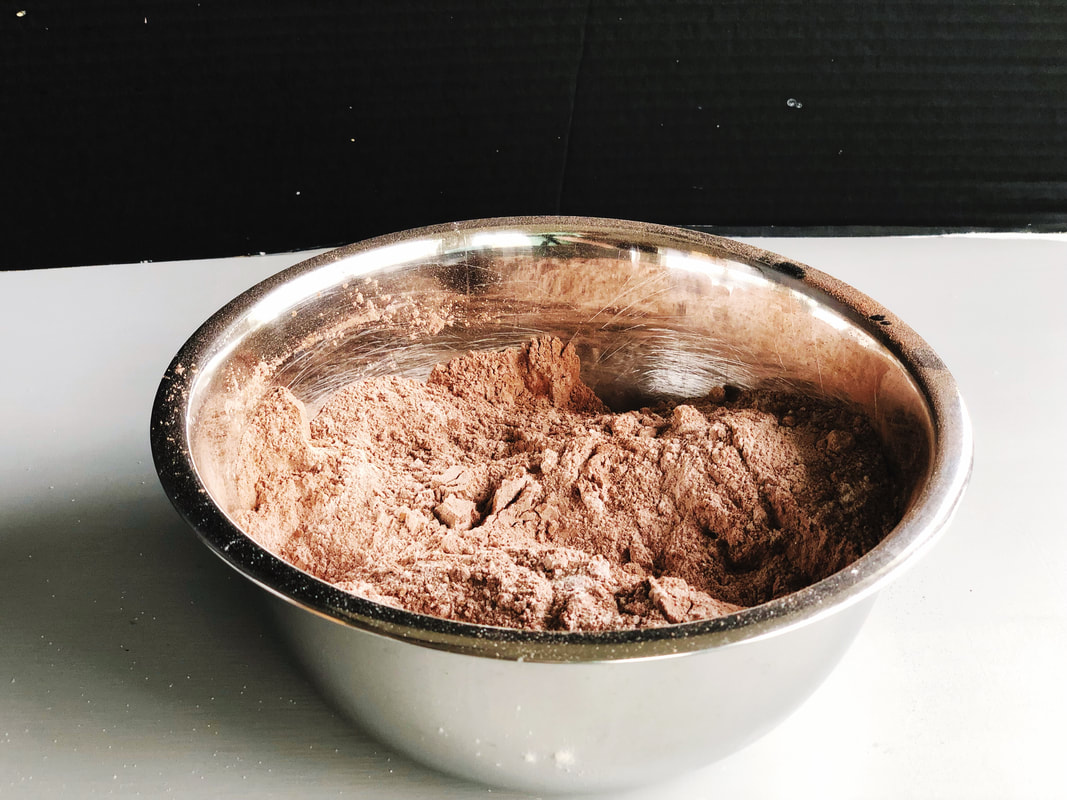 add one egg 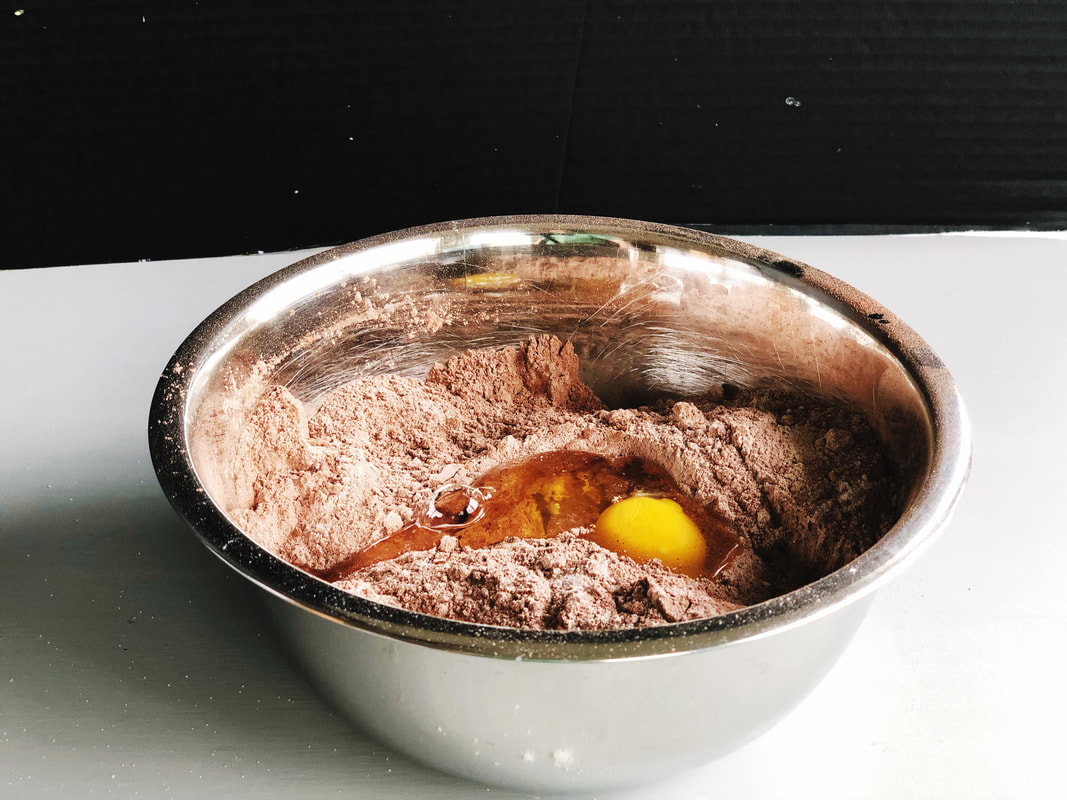 whisk it in 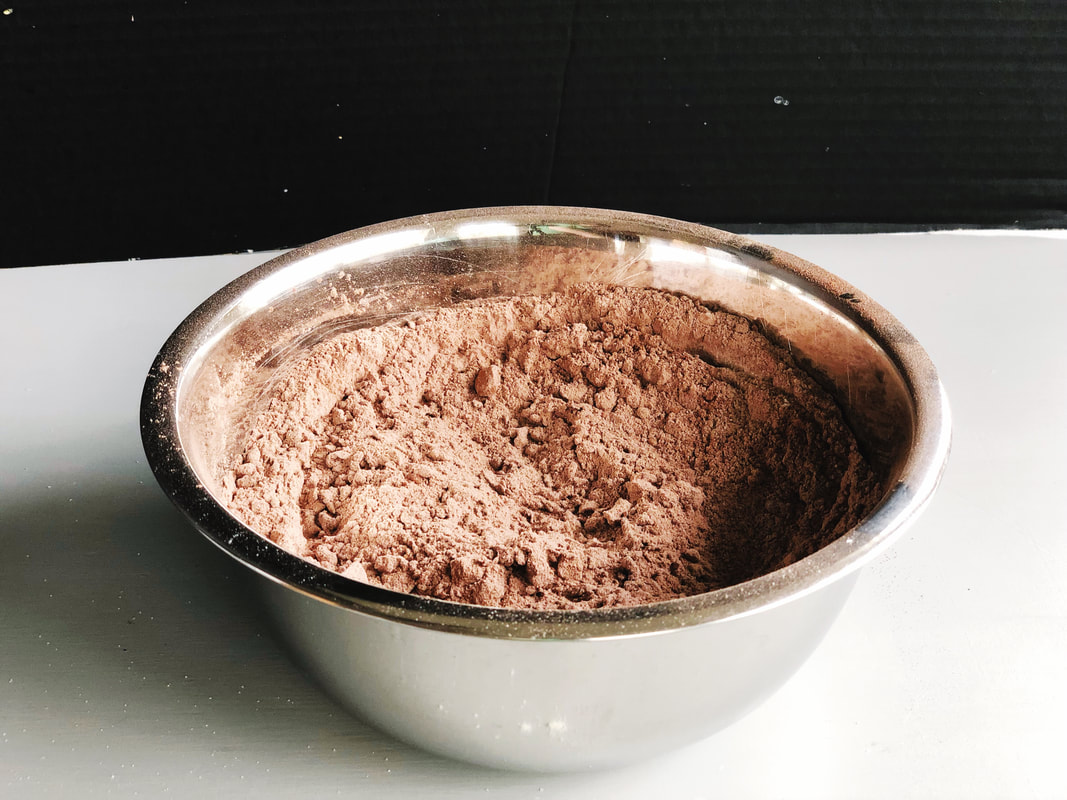 another egg and whisk 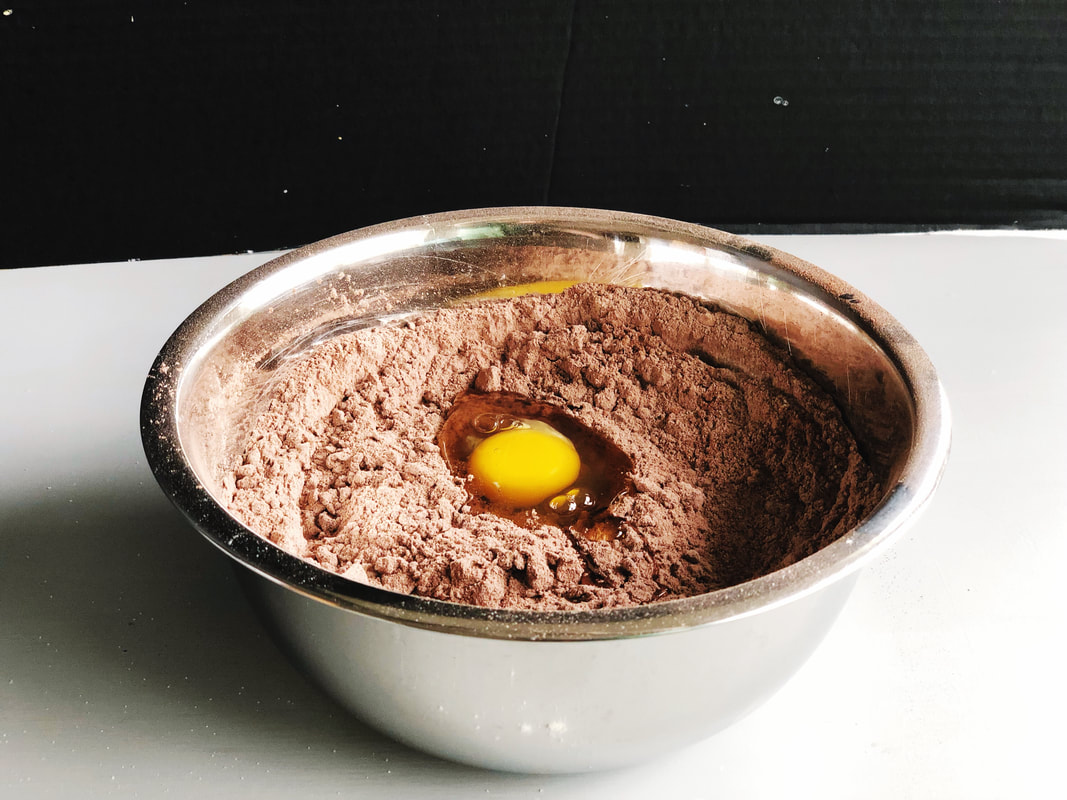 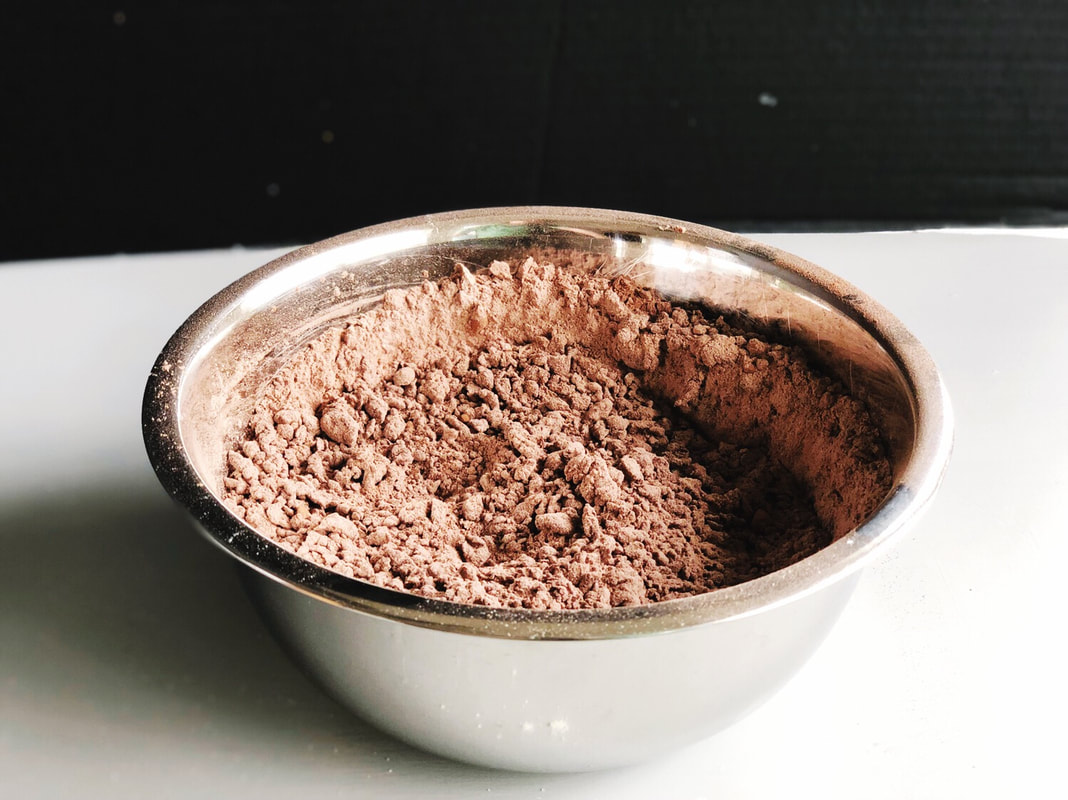 1 Cup of Milk (whole preferably) 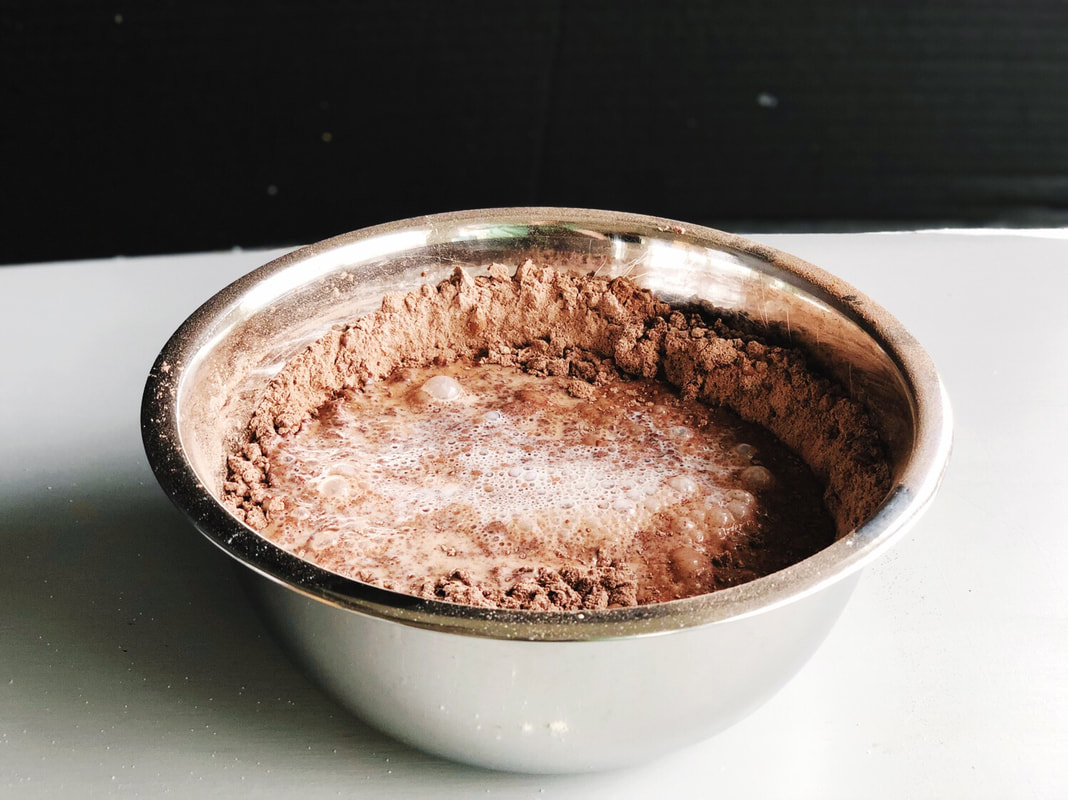 whisk 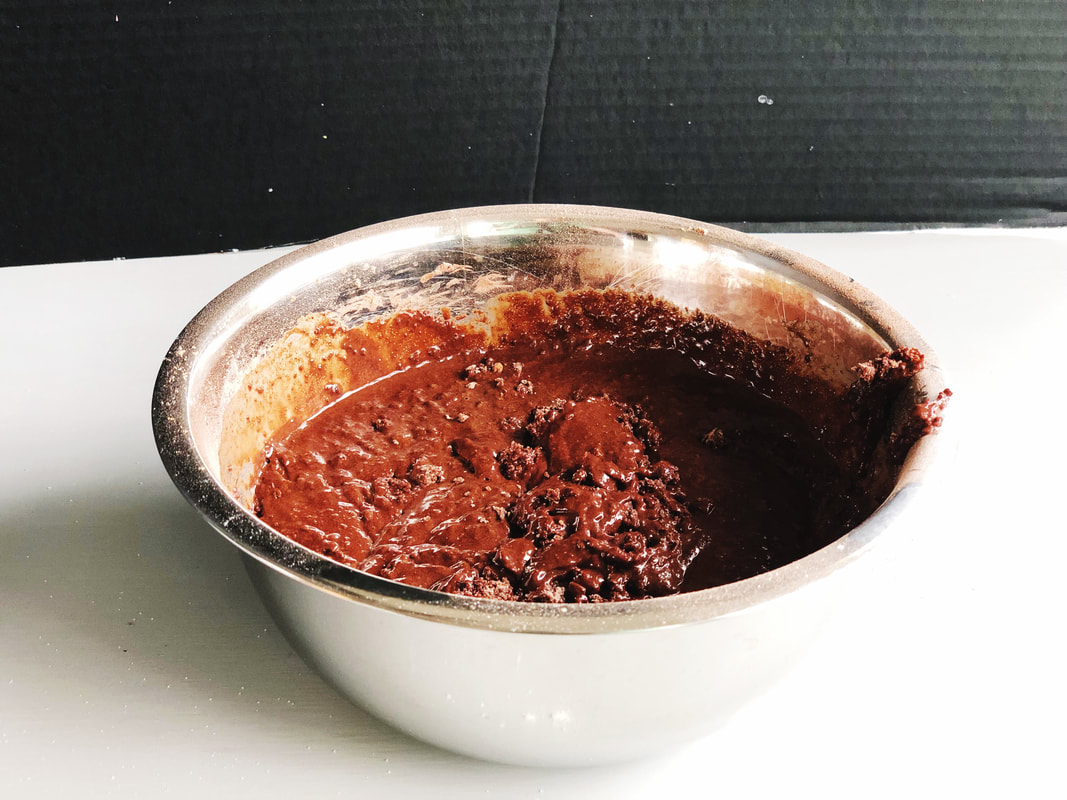 1/2 cup vegetable oil and 2 t vanilla, and whisk it well 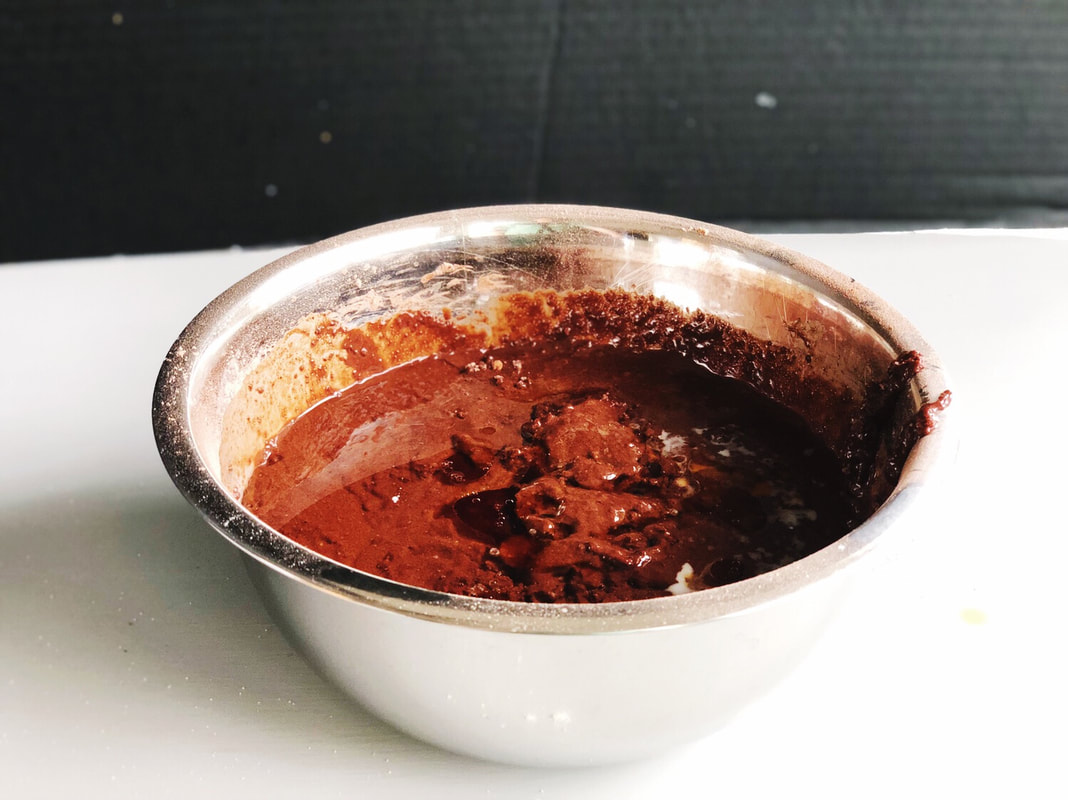 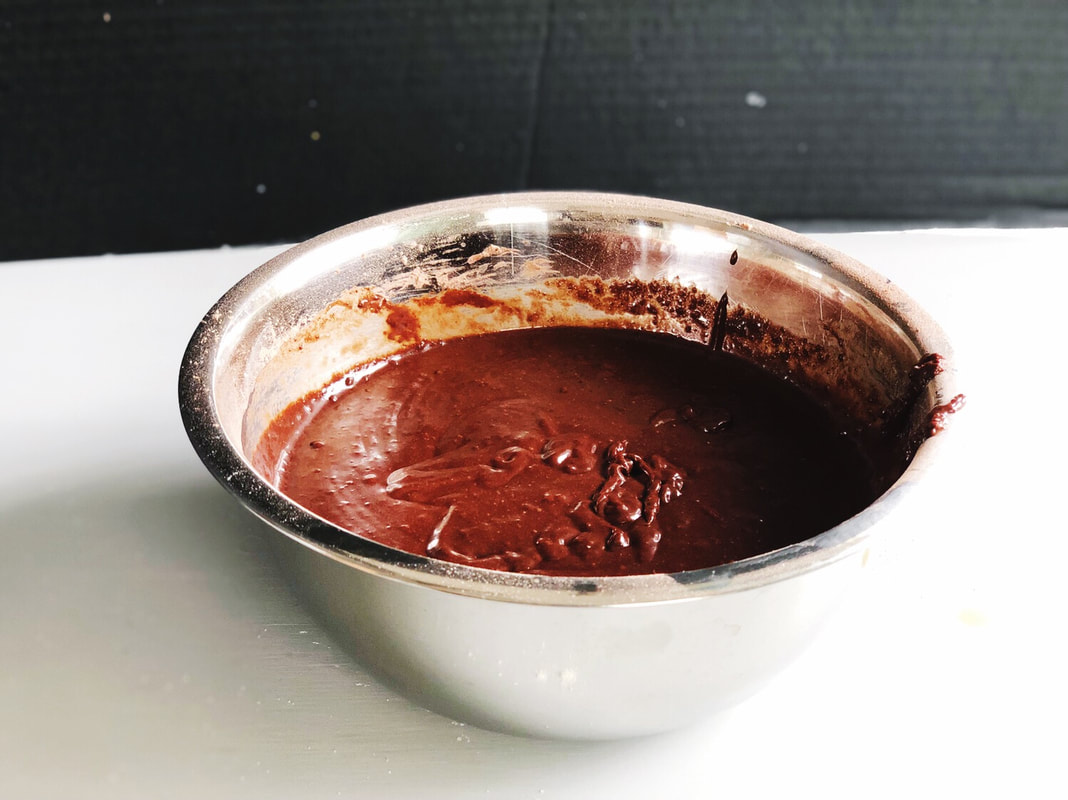 1 cup of fresh brewed coffee 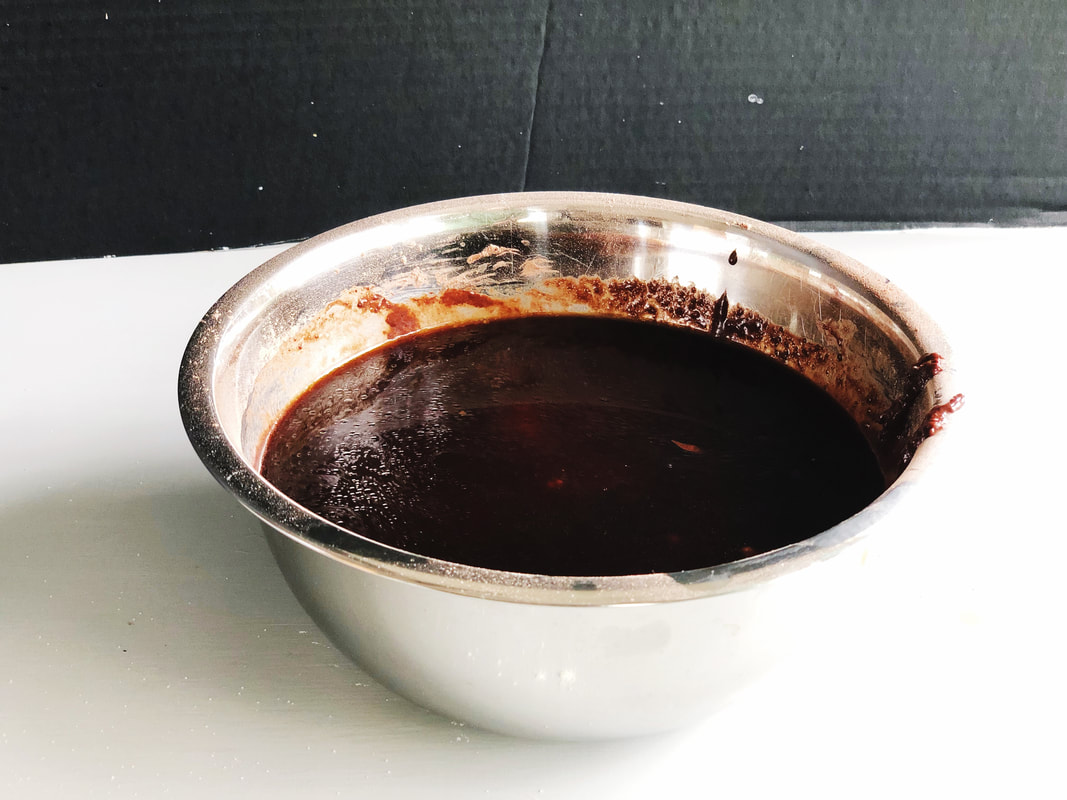 Slowly whisk it in, but make sure it's completely mixed in. 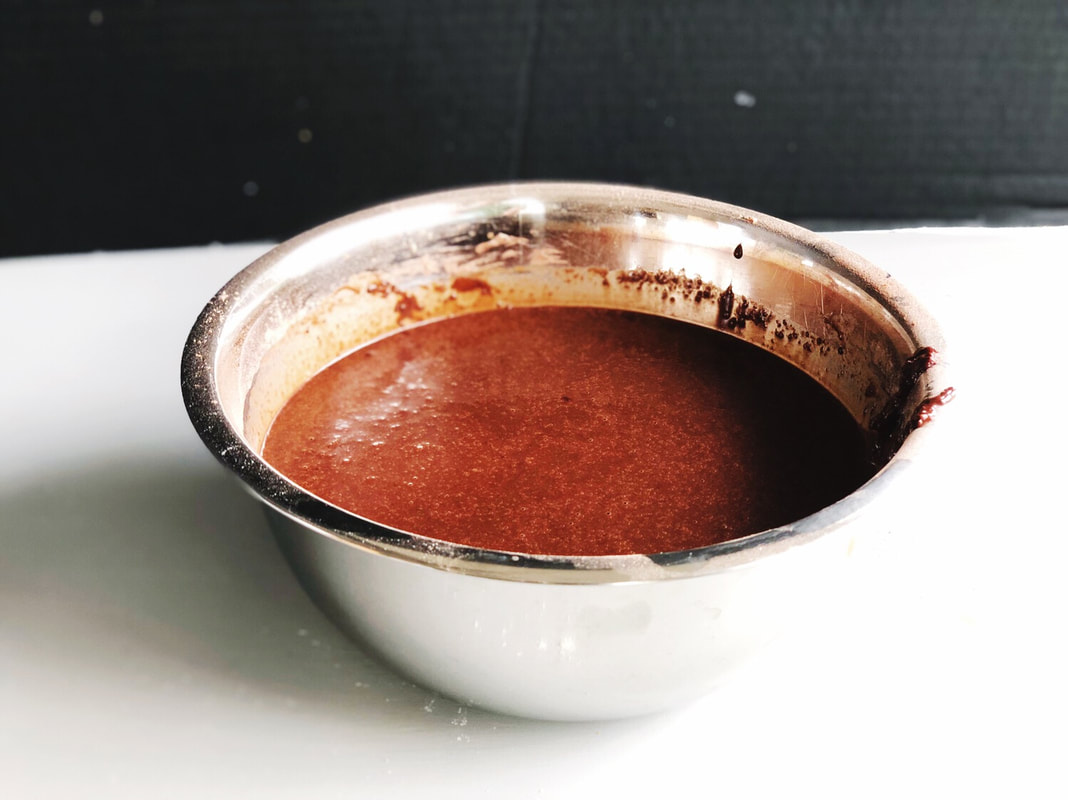 Prep 2 8inch cake pans (affiliate link) by rubbing them with butter and then lining them with parchment paper. 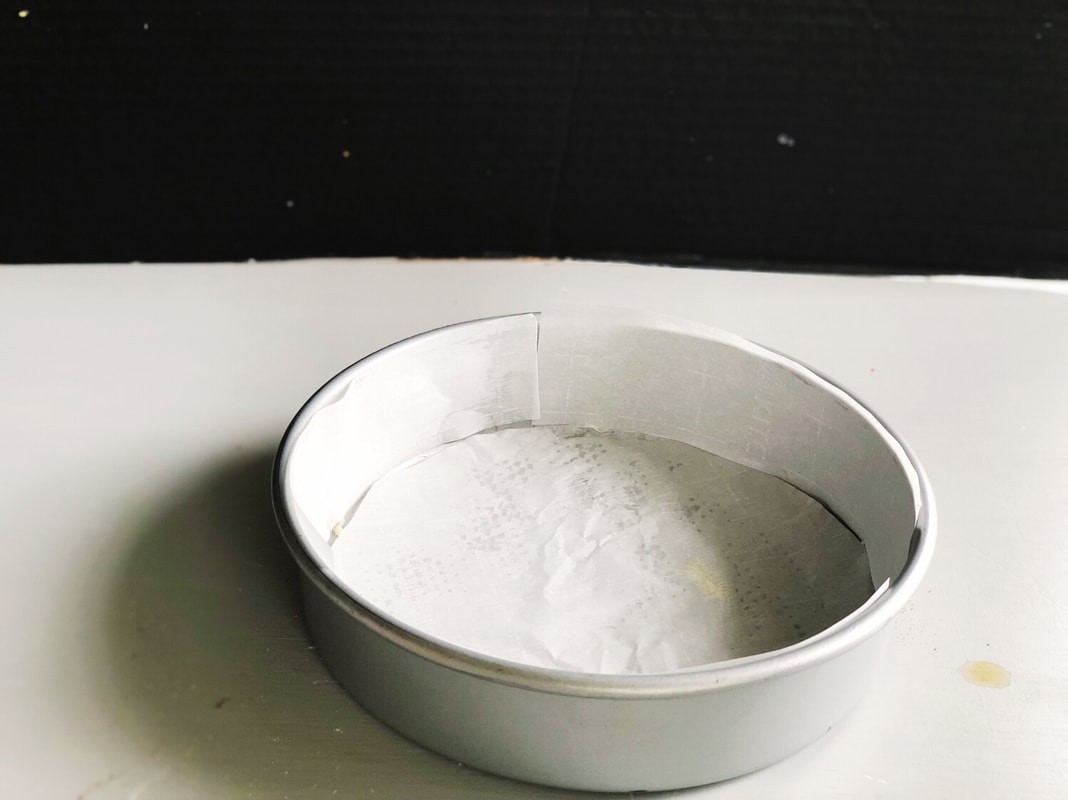 Fill them both evenly with the cake batter 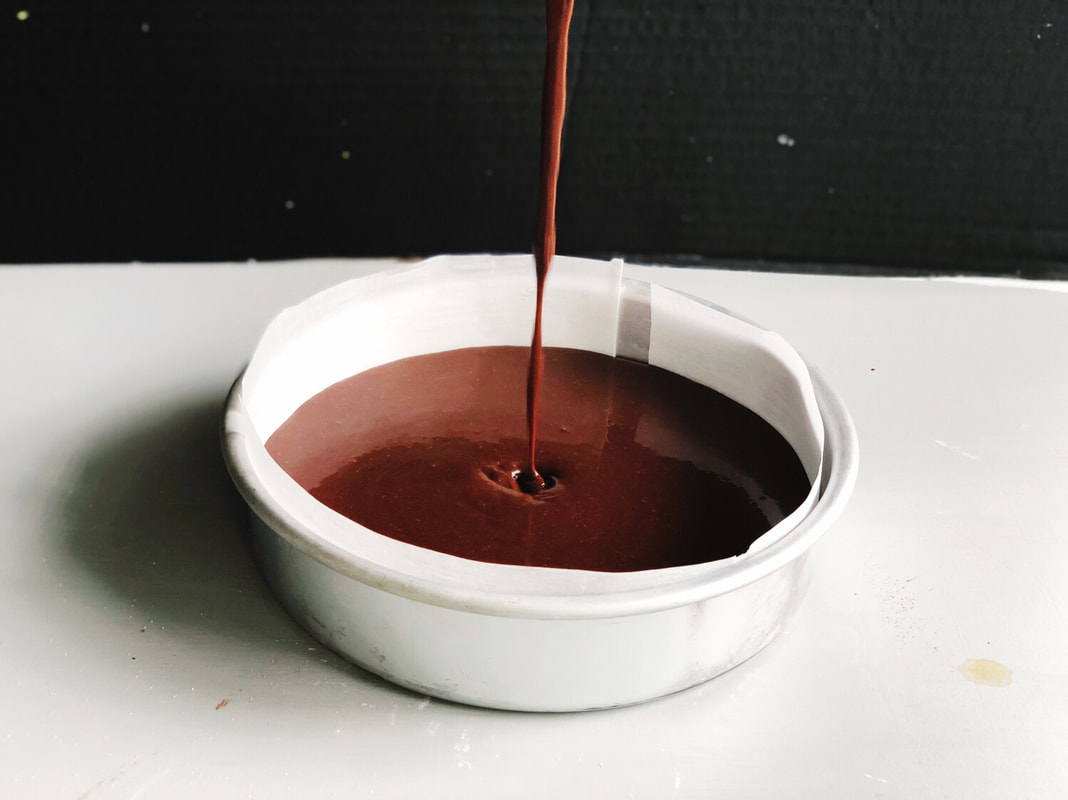 Bake at 350 for 30-40 minute or until they no longer jiggle when you shake the pan. While you're cakes are baking it's a good time to make some Coffee Caramel. I show you how to make it step by step in this blog post, but i'll put the recipe card down below as well. 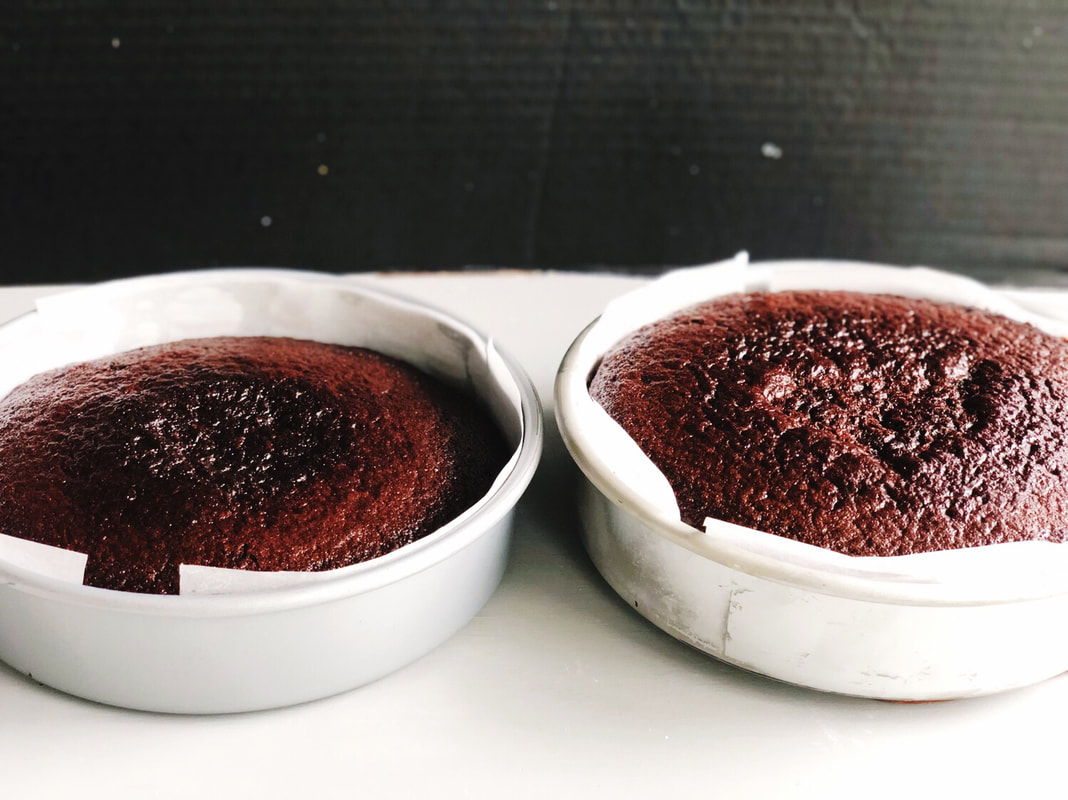 Let them cool in their pans for 15 minutes. Then take them out and wrap them tightly in plastic wrap. Refrigerate them immediately until they are no longer warm, at least 30 minutes but up to 3 days. You could place them in the freezer instead for 30 minutes or up to 3 months. Not only does this help the cake to cool faster, but it traps the moisture inside, making sure your cake won't be dried out after it cools. 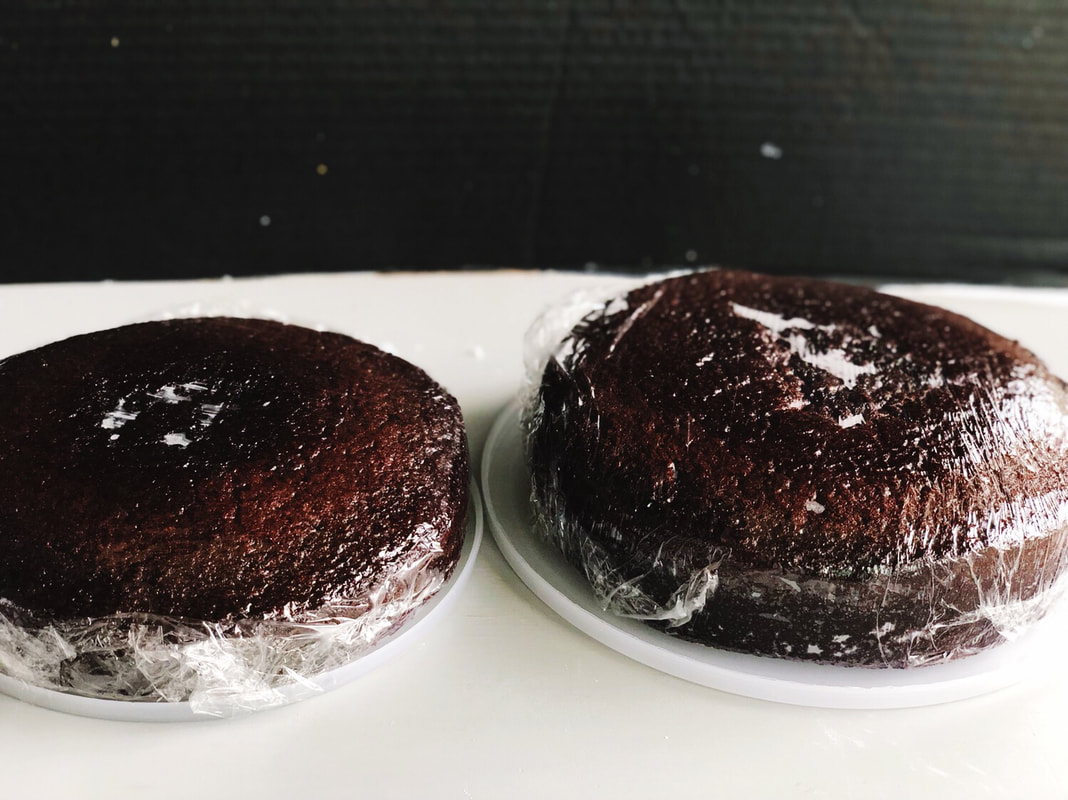 While your cakes are cooling it's a good time to make your frosting. For this cake I used Milk Chocolate Frosting. The step by step instructions for the frosting are on this post, but i'll put the recipe card down below too. Next time I want to try using Bittersweet chocolate and see how that goes! Now that you've made your cake, frosting and caramel it's time to layer. I cut the dome off each of my 8 inch cakes and then cut one in half lengthwise so that I'd have three layers (I would have done both that way but I didn't pour my batter as evenly as I thought LOL.. always use a scale) But that's totally not necessary, I just wanted more filling and a taller cake. So place your first layer down. 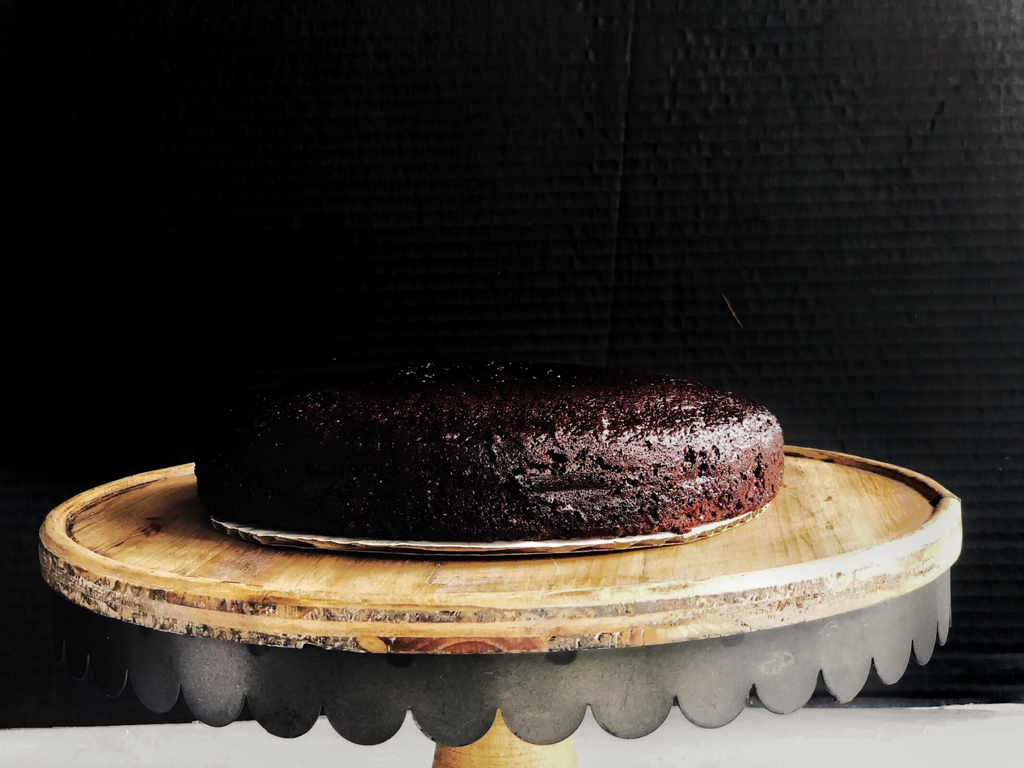 Dollop some frosting on top 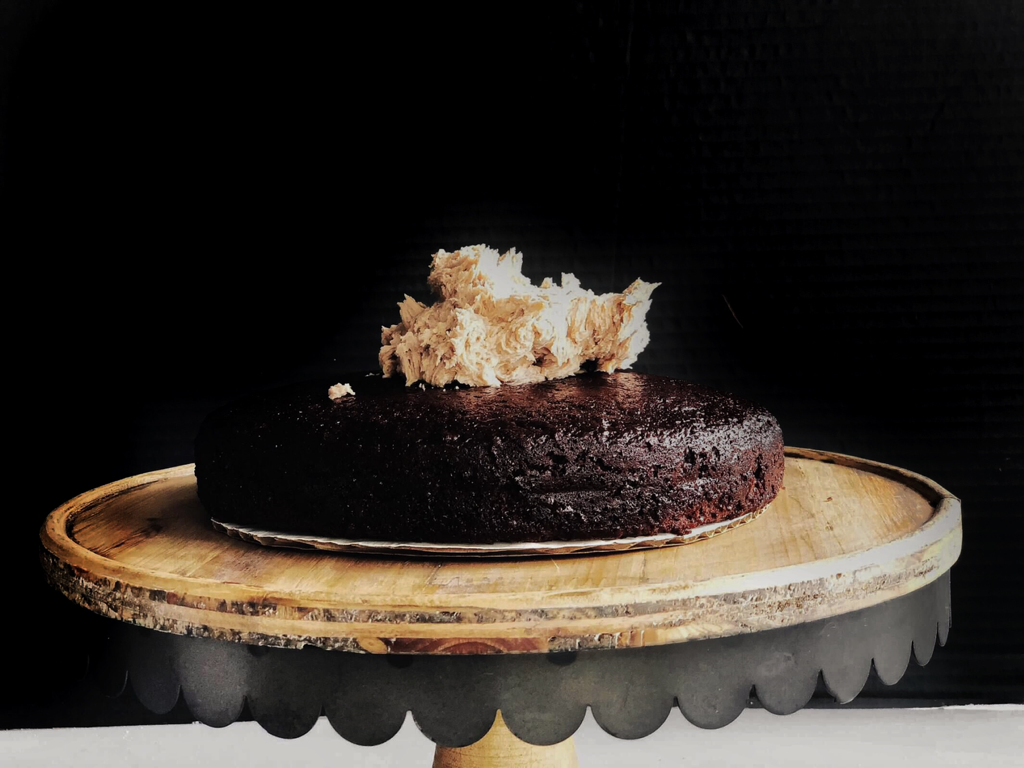 Push it around to the edges with a knife  Pour some cooled but still warm caramel over the frosting 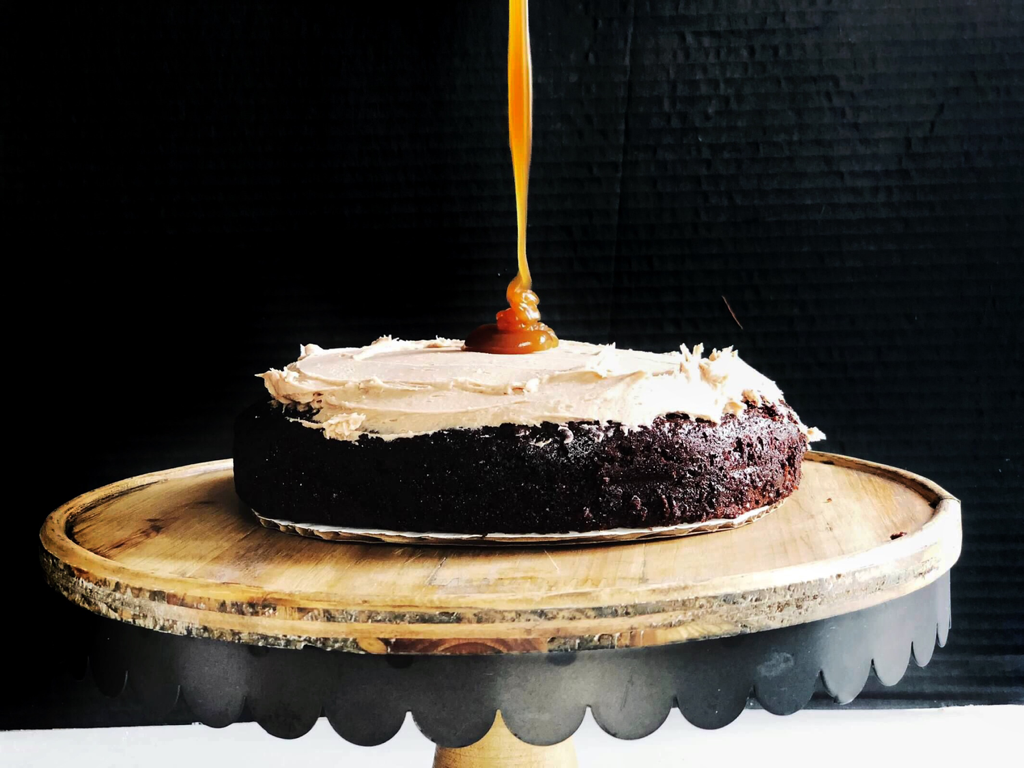 Spread it to the edges as well  Repeat with the rest of your layers 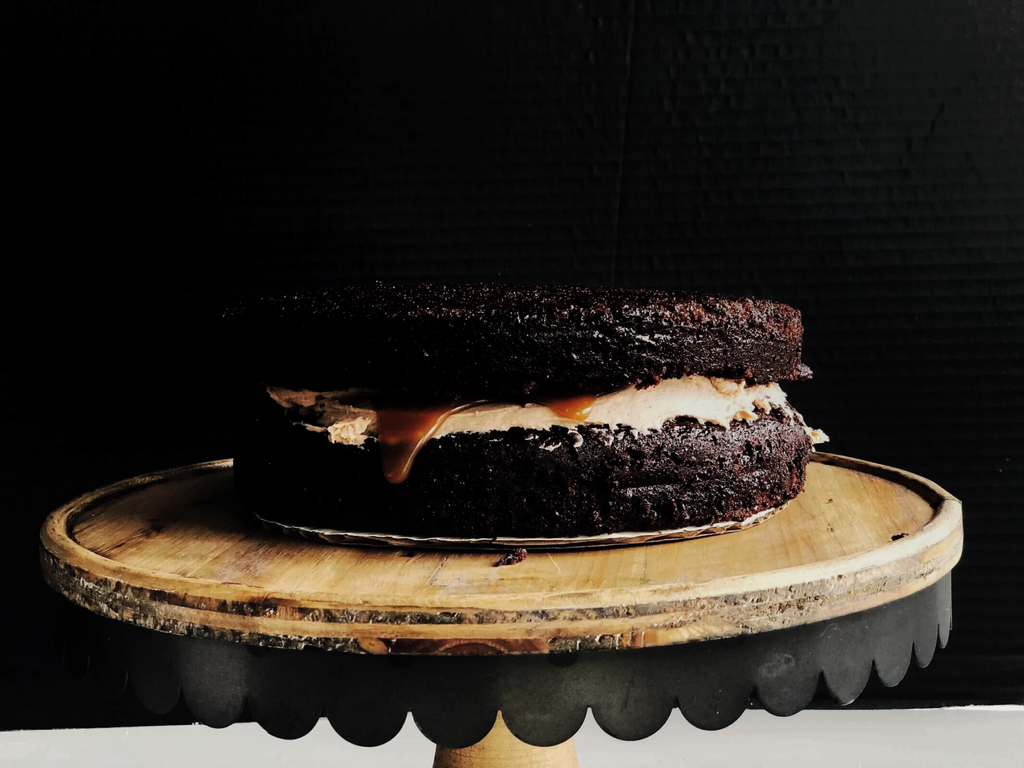 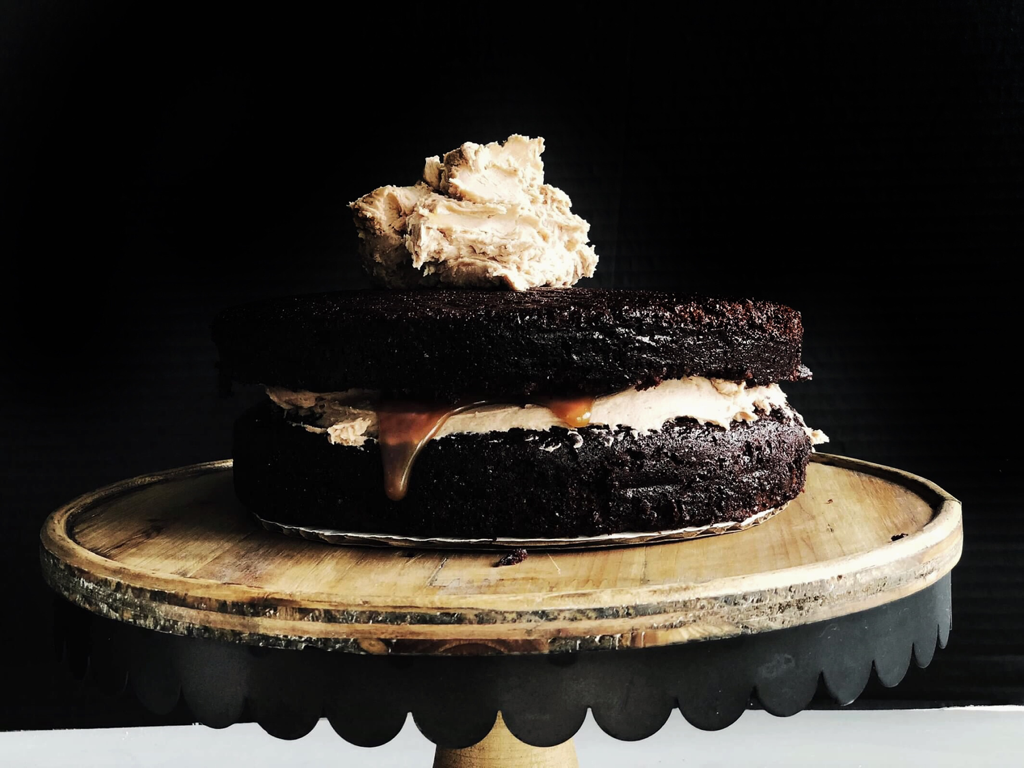 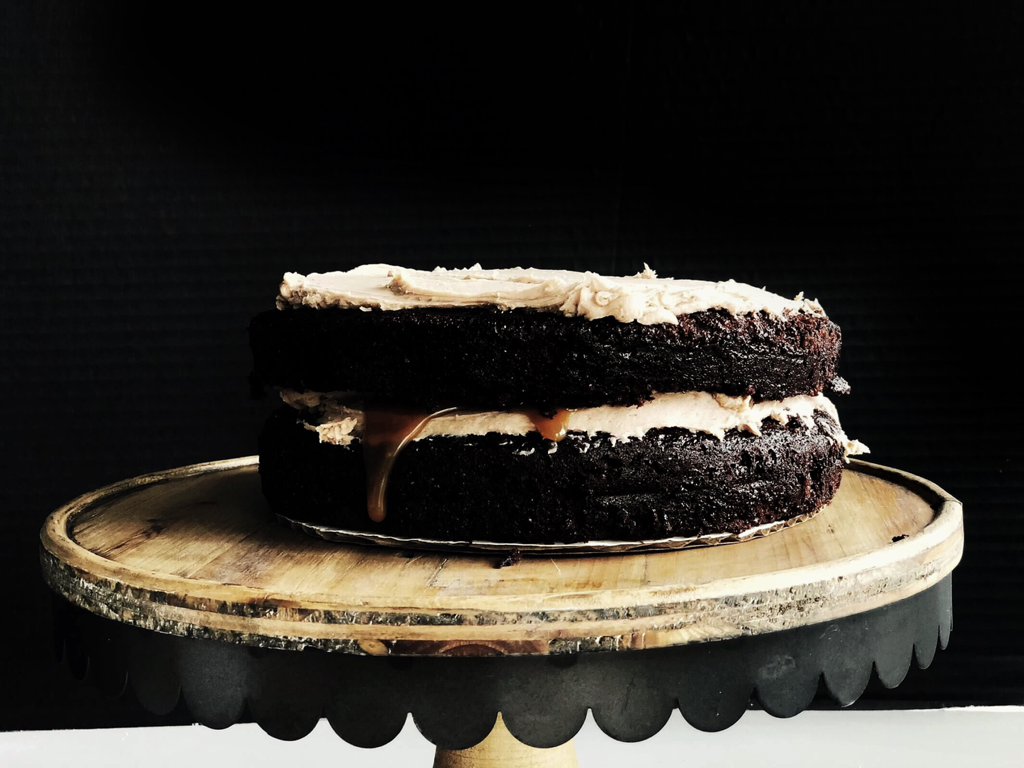 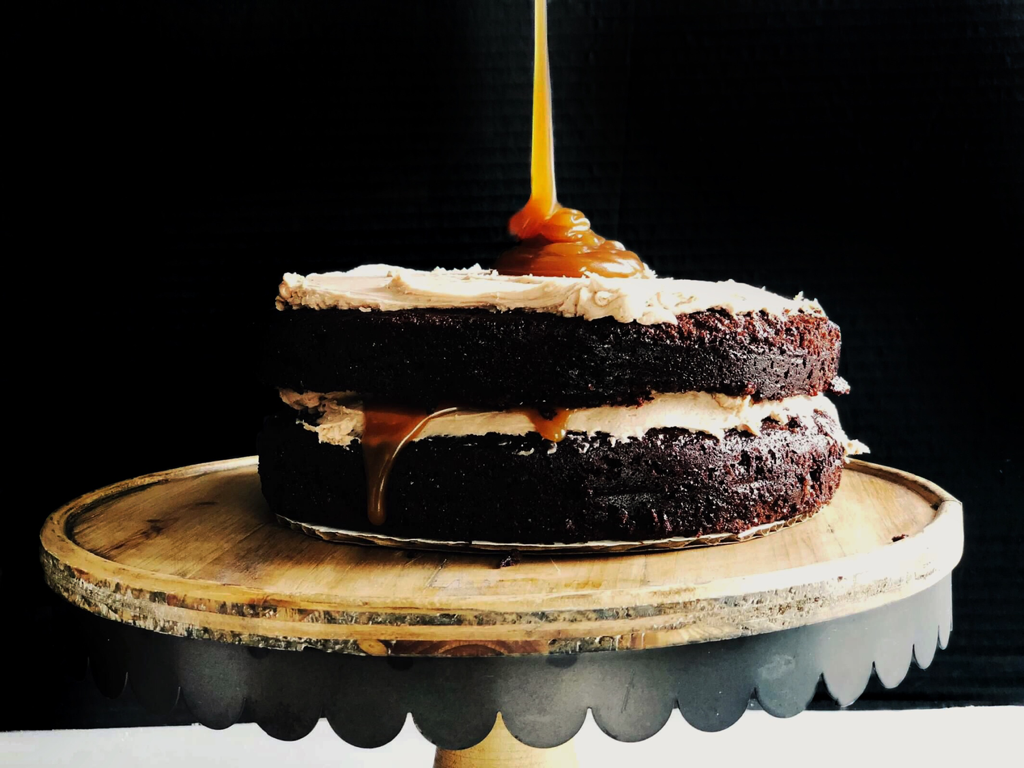 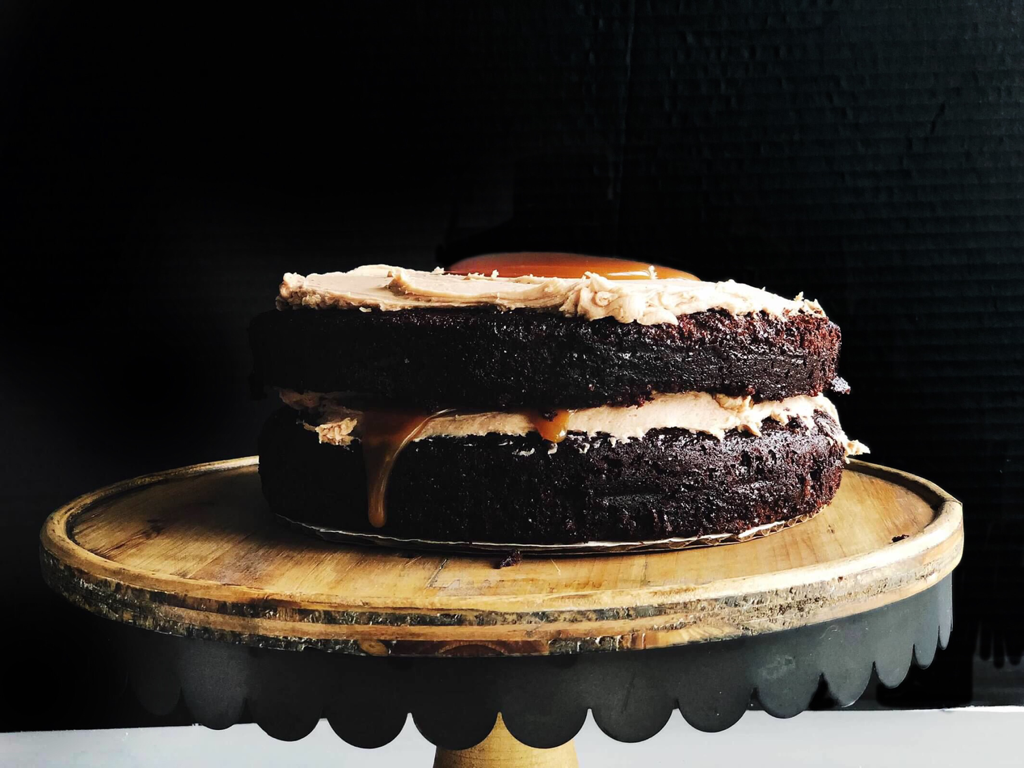 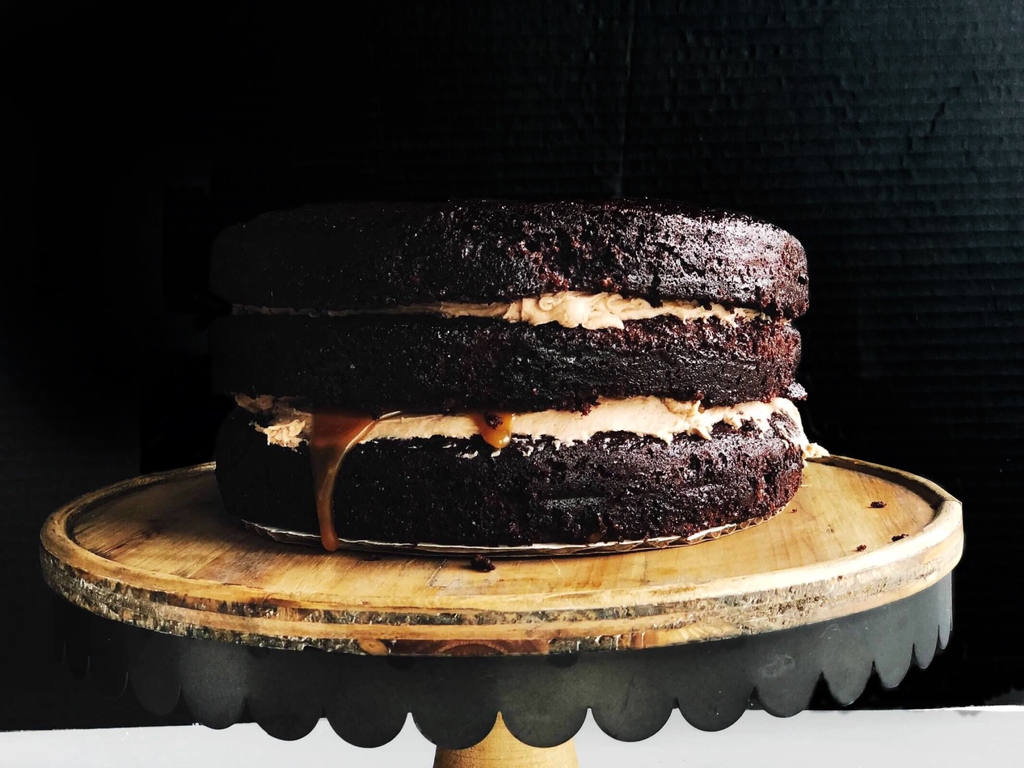 Once you've got your last layer on, spread a thin coat of frosting over the whole cake. don't worry if it's ugly. 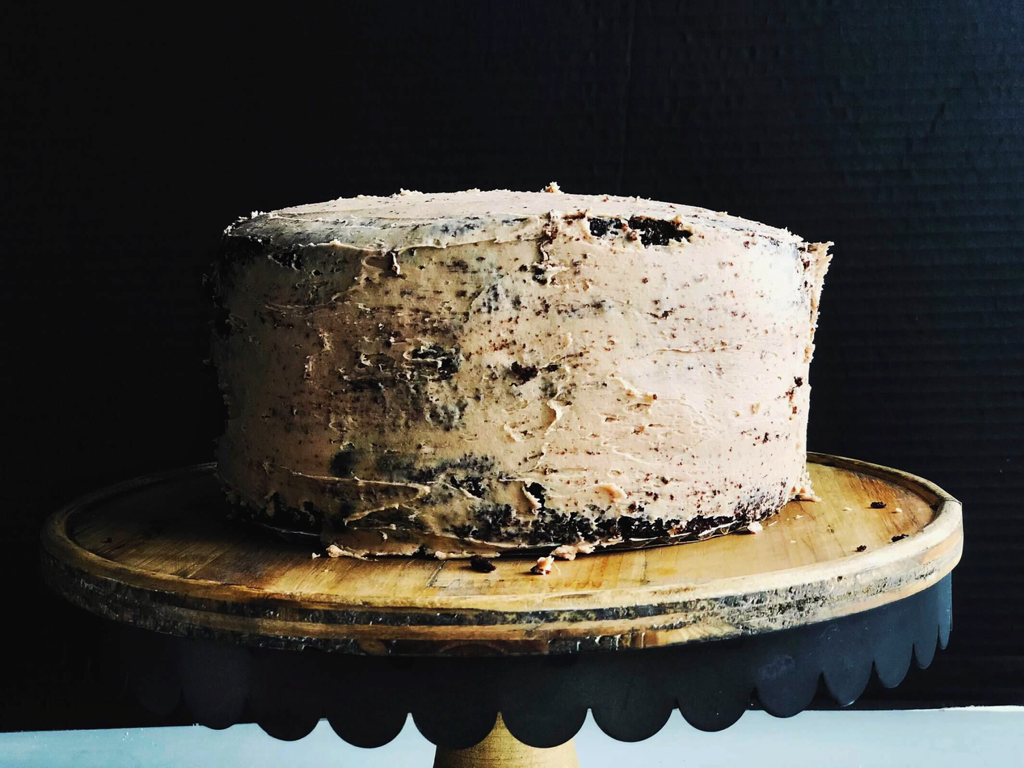 This is our crumb coat. Refrigerate the cake just like this until you touch the cake and don't leave a fingerprint. 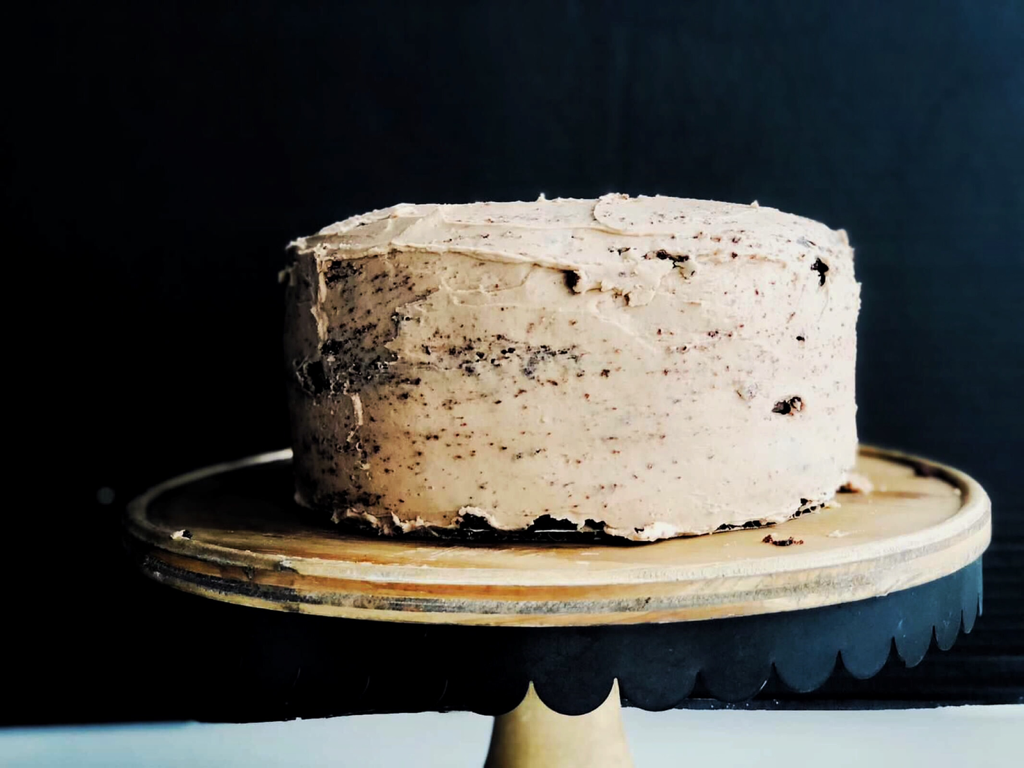 Now you can really lay on the frosting. This will be your final coat and now that the cake is cold and we have a firm layer of frosting coating the cake, it'll be easier to get a smooth finish. 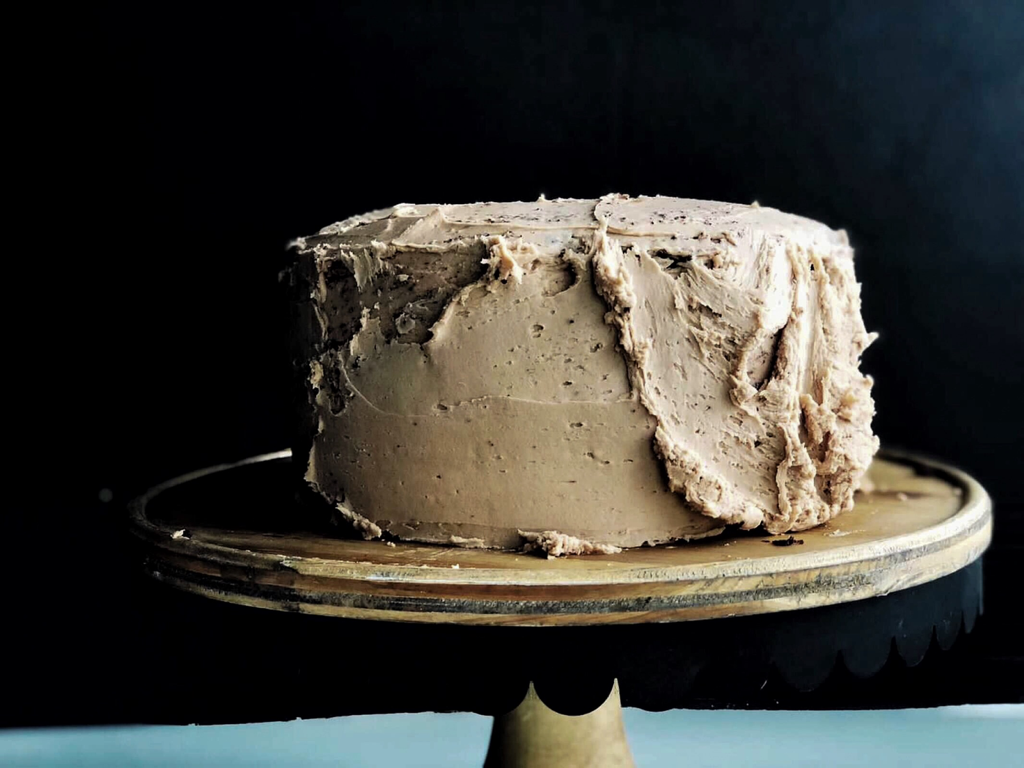 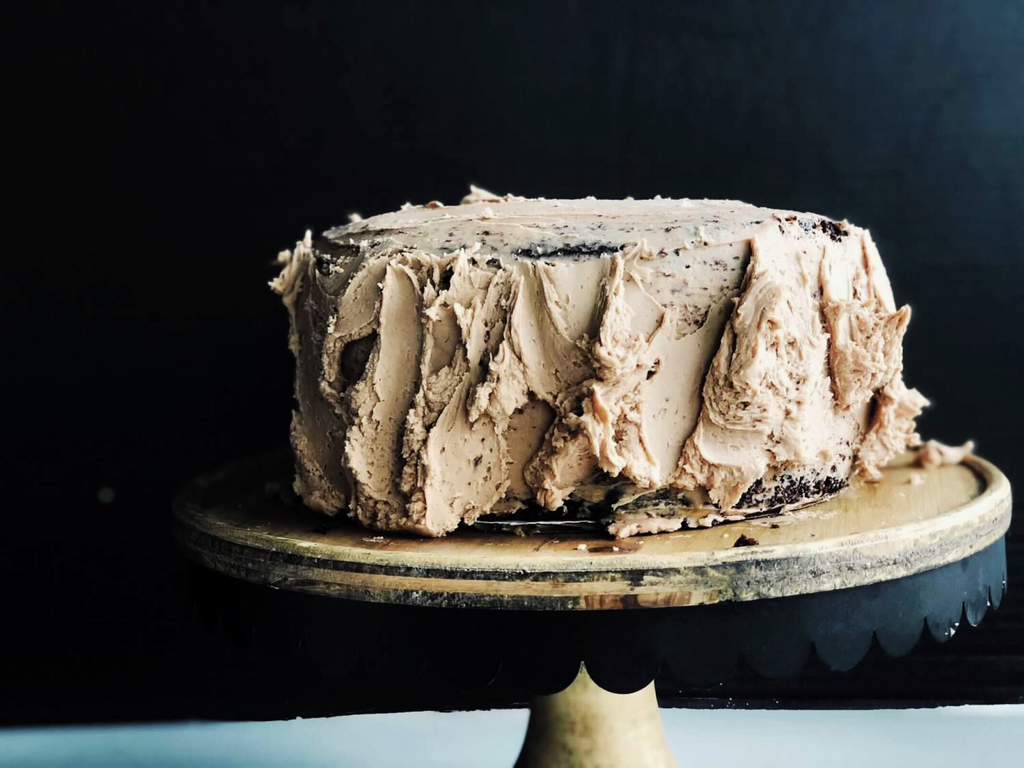 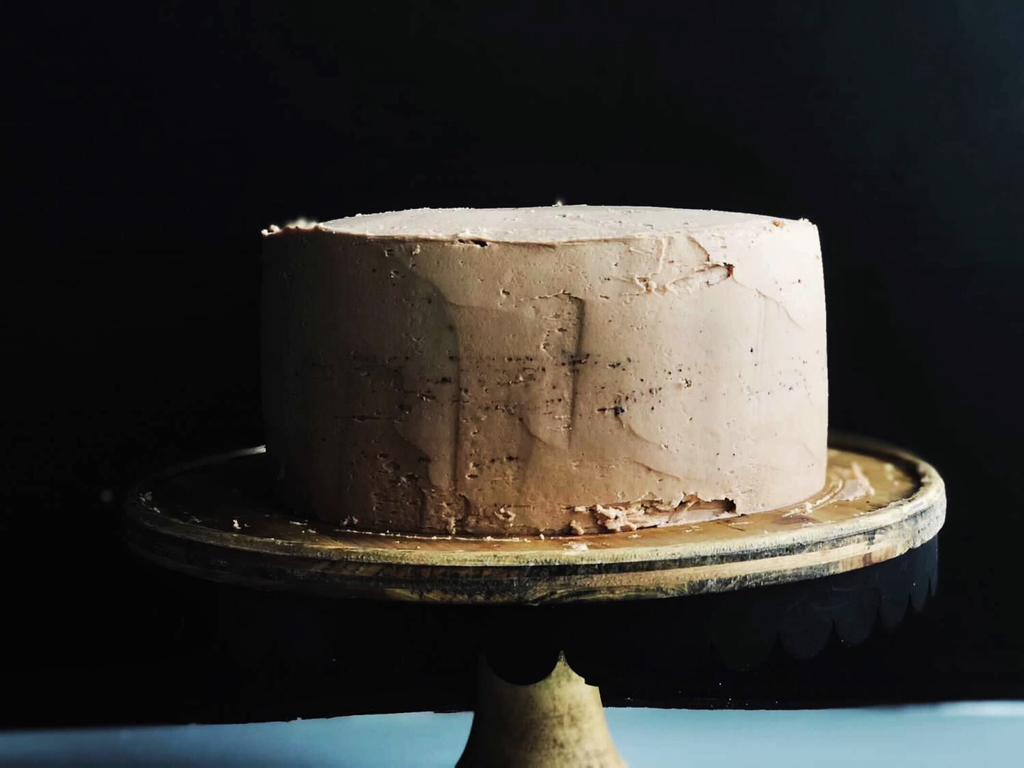 Yay! we're almost done. Last step is to pour the rest of your caramel over the cake and let it drip down. 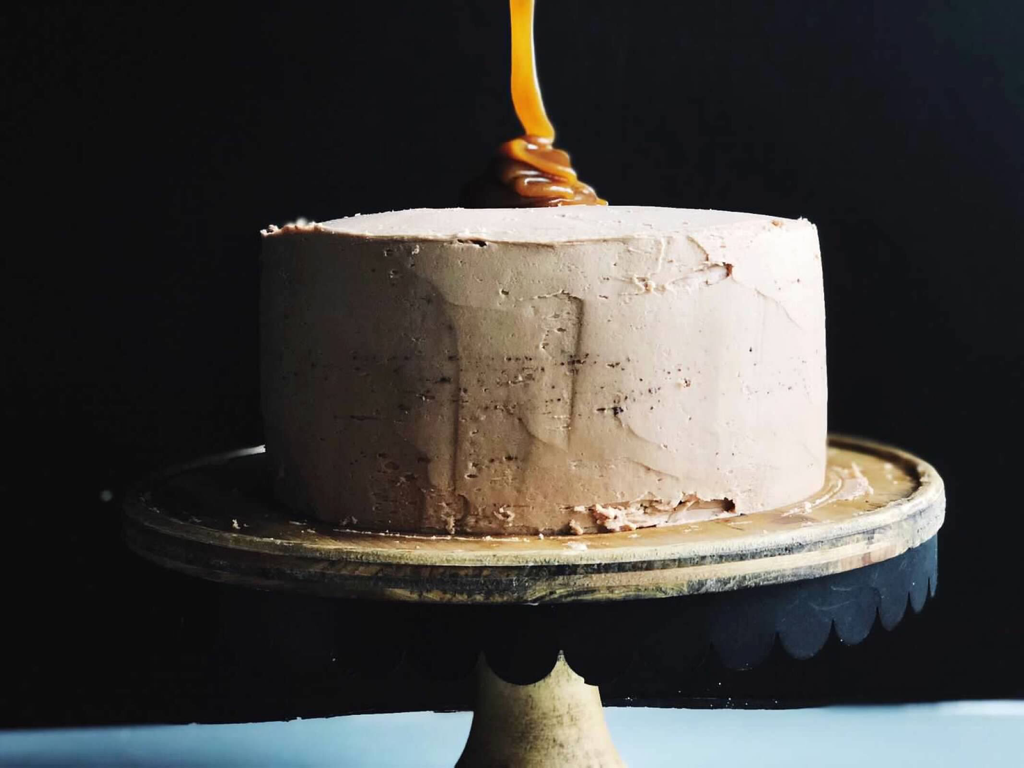 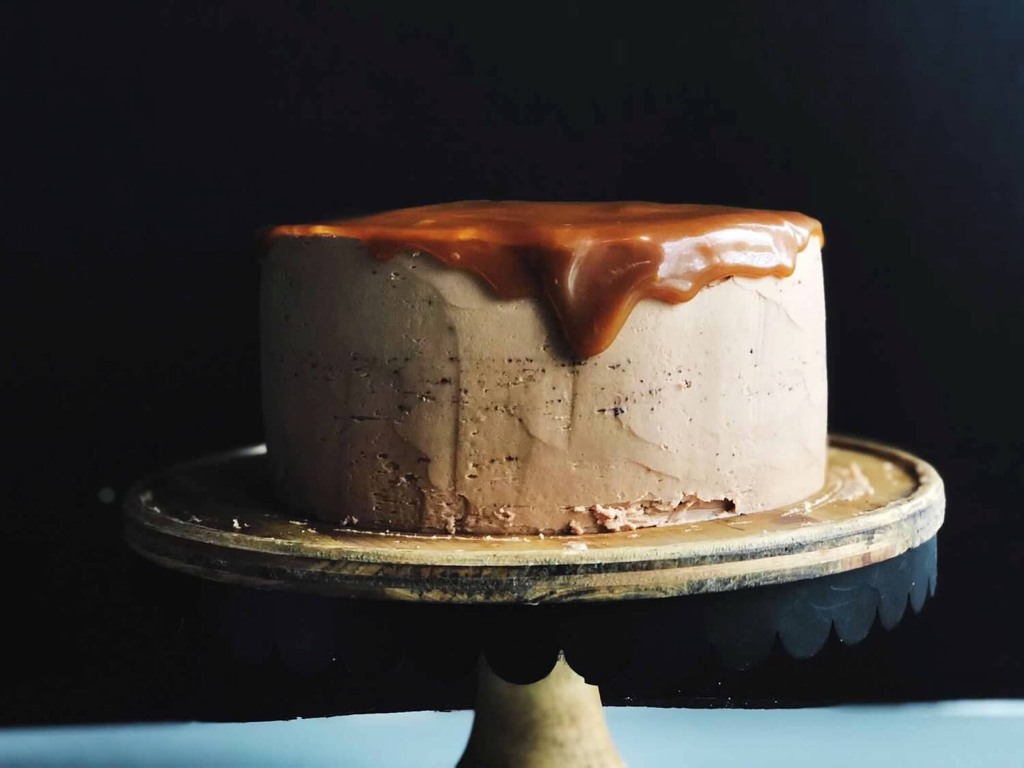   You did it! now don't be rude, share it with your friends. 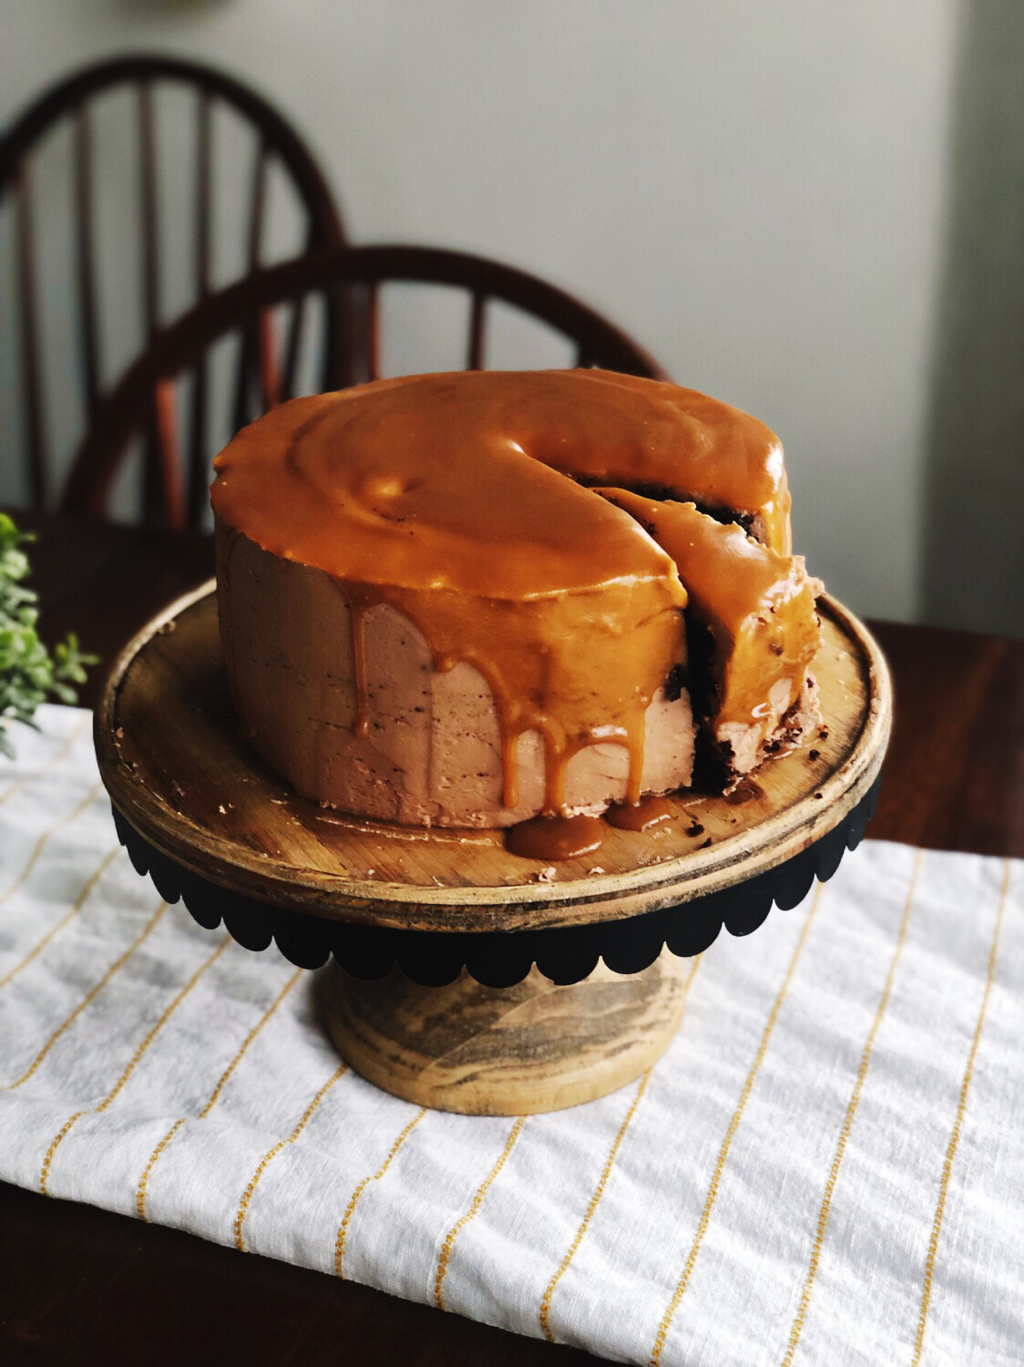  Let me know if you make this recipe by taking a photo and tagging me @MartinezMade_ on Instagram or use the Hashtag #MartinezMade. Or comment here and let me know what you think! It'll make my day 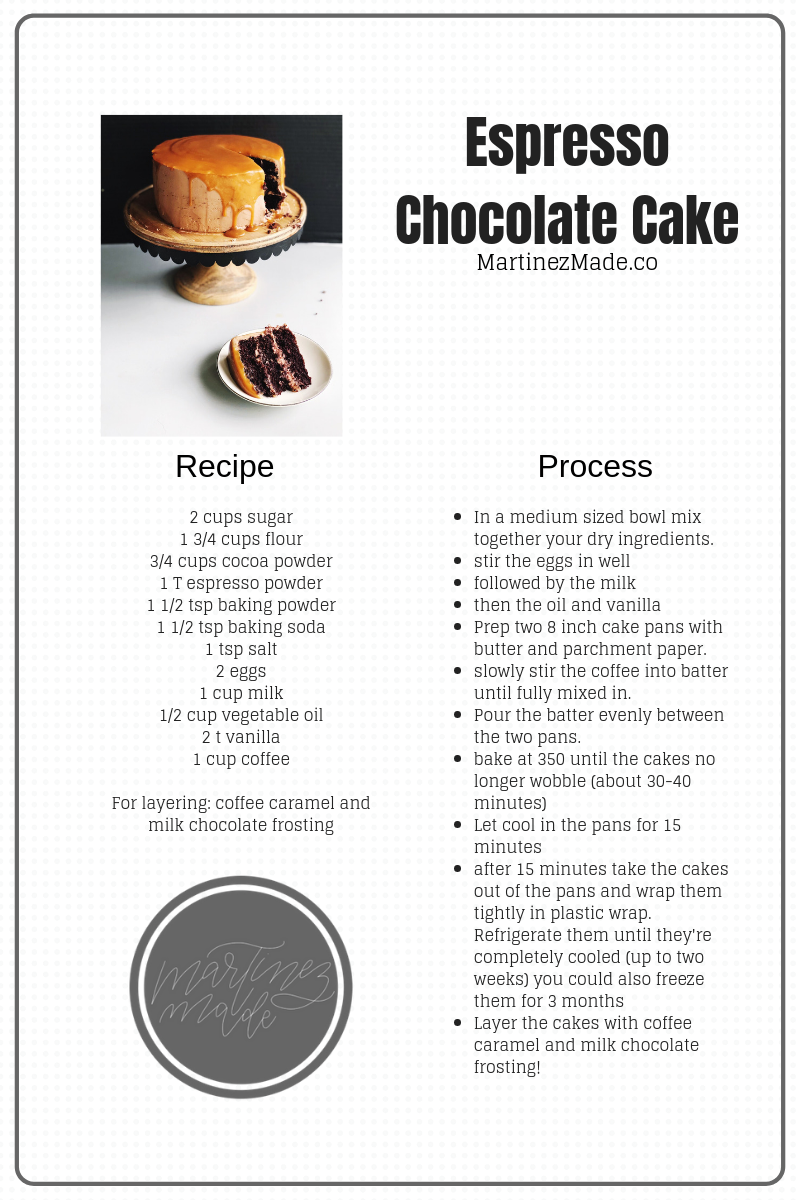 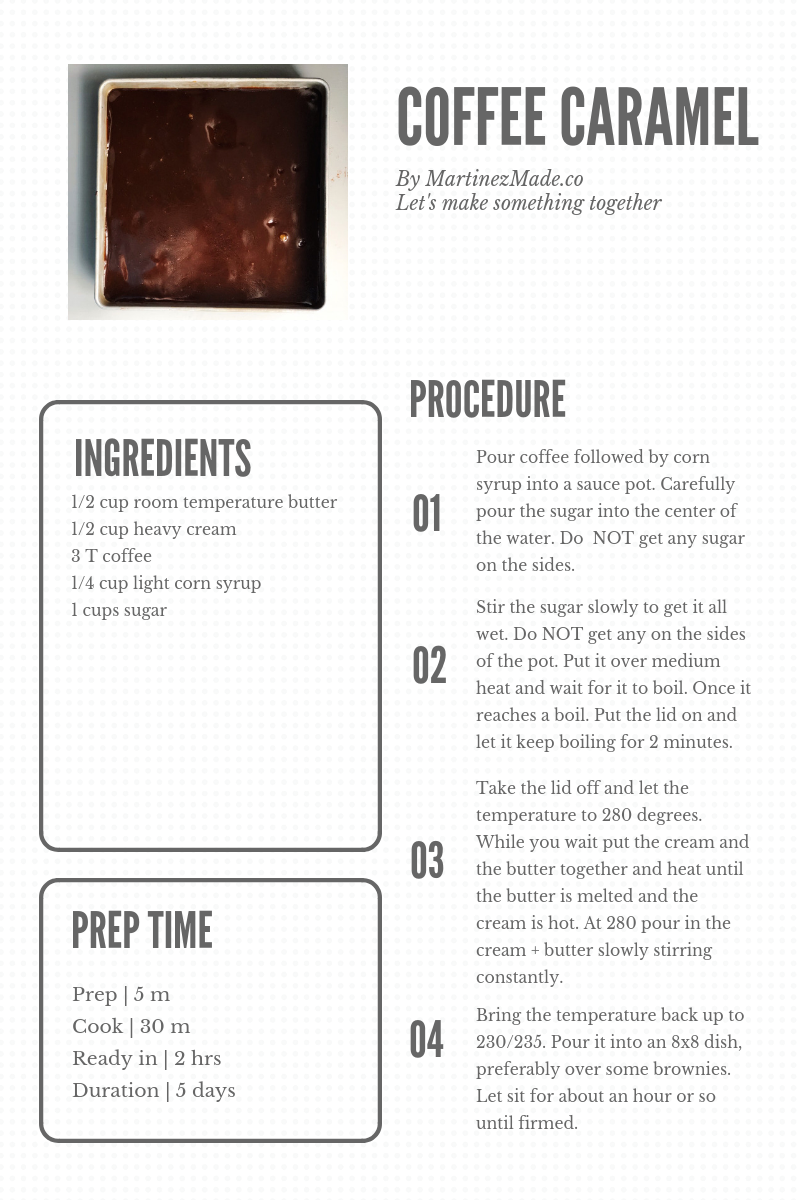 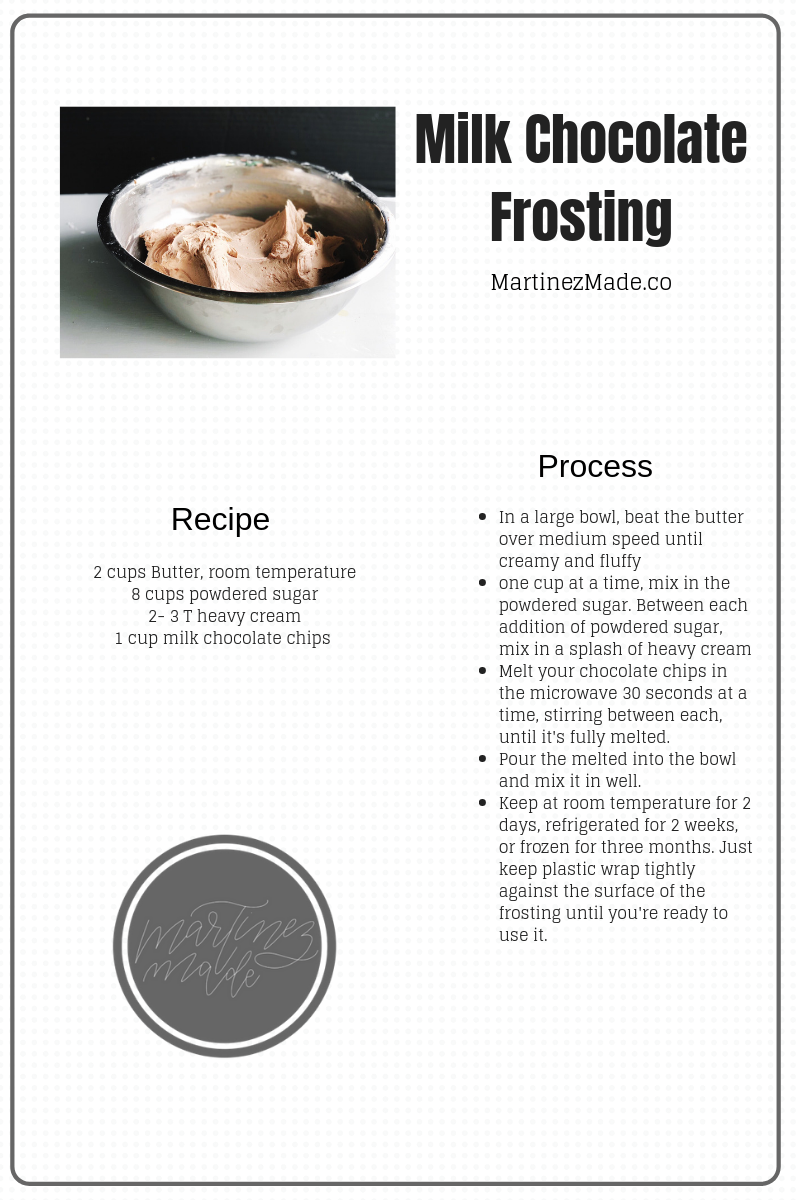 
1 Comment
Allison Turnbow
8/10/2019 03:42:31 pm
words can't espresso how much I want this cake Leave a Reply. |
Categories
All
Archives
April 2020
|
 RSS Feed
